ShopPilot user manual: run your shop from your phone
ShopPilot is an offline POS, inventory and accounts app for retail, grocery and wholesale shops in Bangladesh. Sell with barcode scanning, take cash, bKash, Nagad or bank payments, track stock and customer dues (বাকি), and see your profit — in English or বাংলা. This guide walks through every screen, from your first product to month-end reports.
Getting started
First launch
- Install ShopPilot from Google Play and open it.
- Tap Continue with Google and pick the Google account you want your shop linked to.
- Fill in your profile (your name and phone number), then go through the short welcome tour. You can replay it any time from Settings.
- Set up your shop: shop name, currency and your first branch. You land on the Dashboard when you're done.
Finding your way
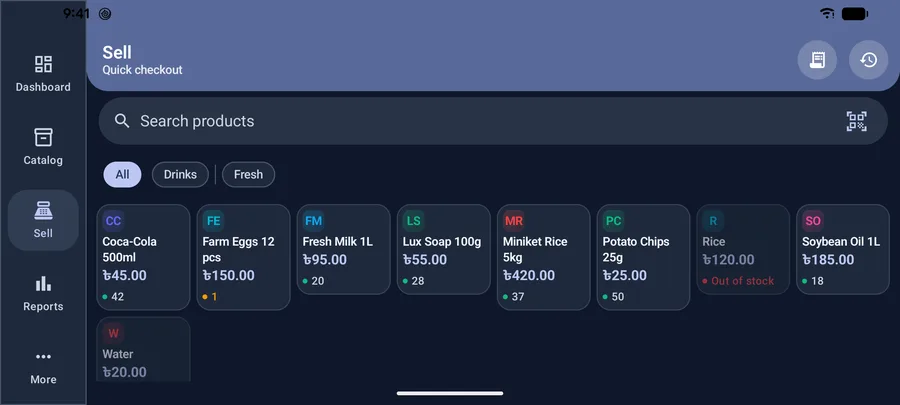
The bar at the bottom of the screen has five icons. On a tablet or with the phone turned sideways, they move to a menu on the left with their names.
Dashboard
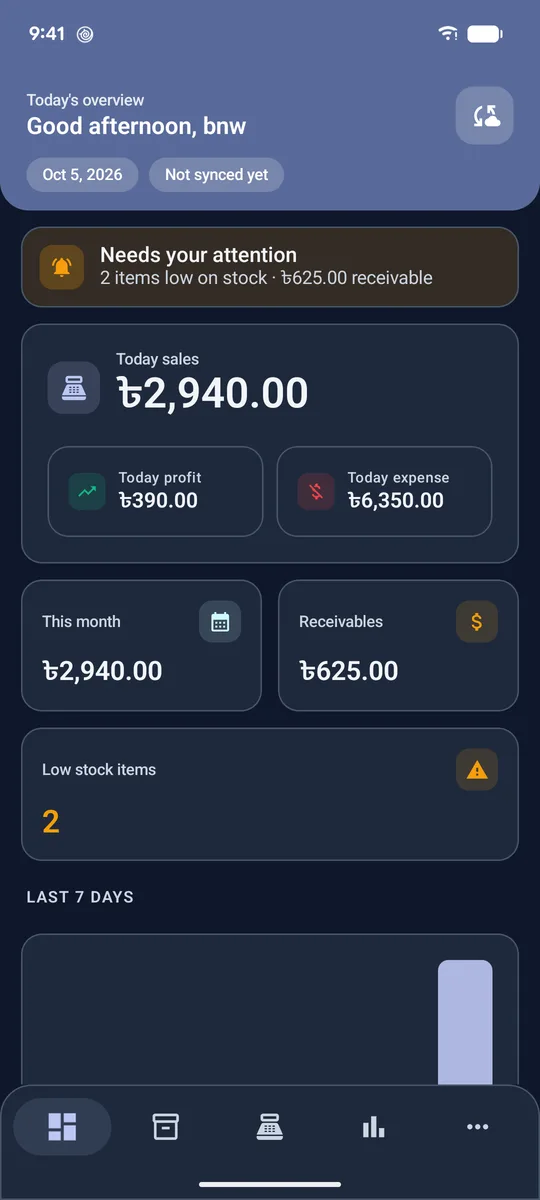
Your day at a glance
- Needs your attention lists items running low and money customers owe you.
- Today sales shows the day's takings, with today's profit and expenses underneath. Tap any of them to open the details.
- This month, Receivables (money owed to you) and Low stock items sit below.
- Last 7 days charts daily sales, and Quick actions start a new sale, add a product or record an expense.
Products
Add a product
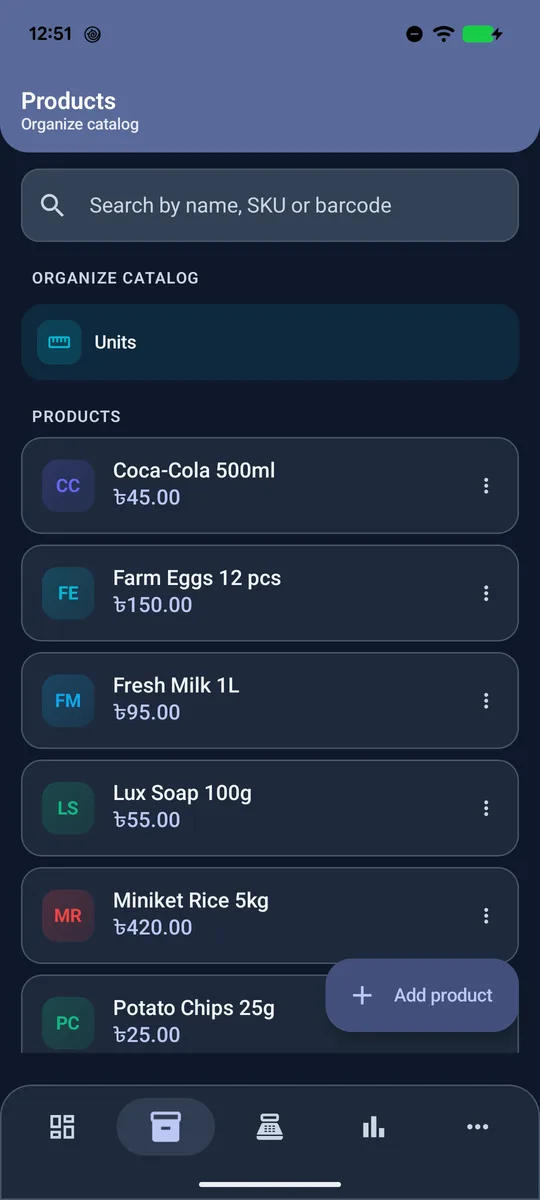
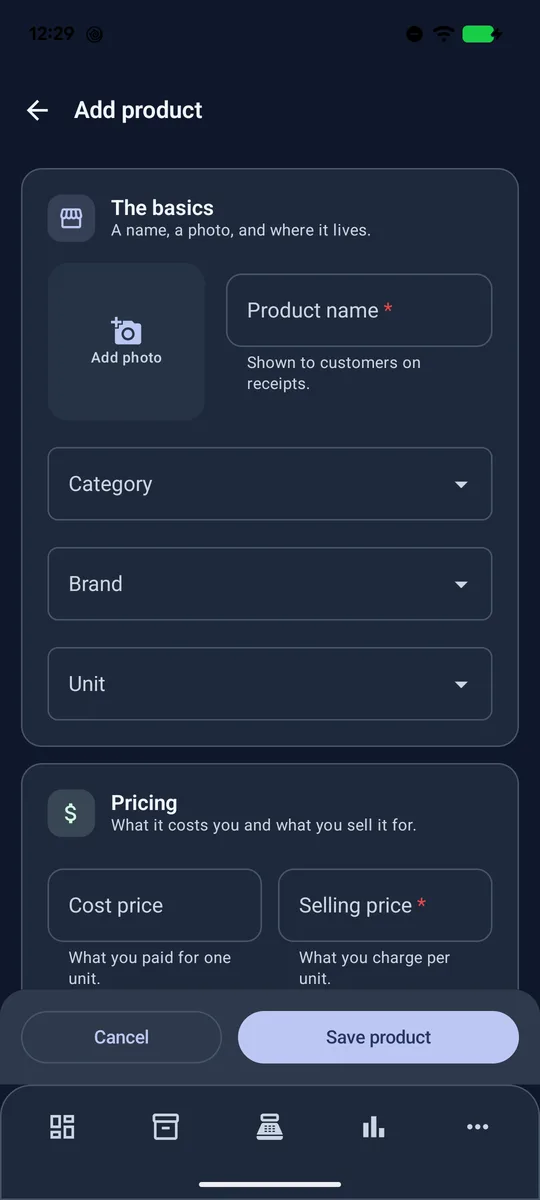
- Open Catalog and tap Add product.
- Enter the Product name. Add a photo, category, brand and unit if you use them.
- Enter the Cost price (what you pay) and Selling price (what you charge). Selling price is required.
- Optionally set a Low stock alert level, a barcode (tap the scan icon to read it with the camera), or variations such as sizes and colours.
- Tap Save product.
Buying stock
Record a purchase from a supplier
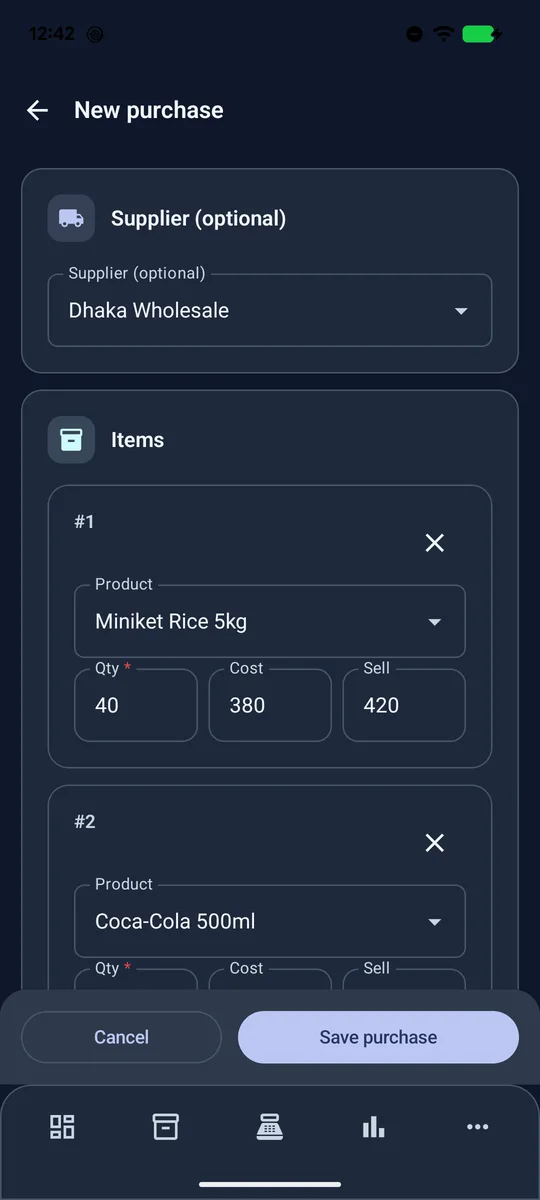
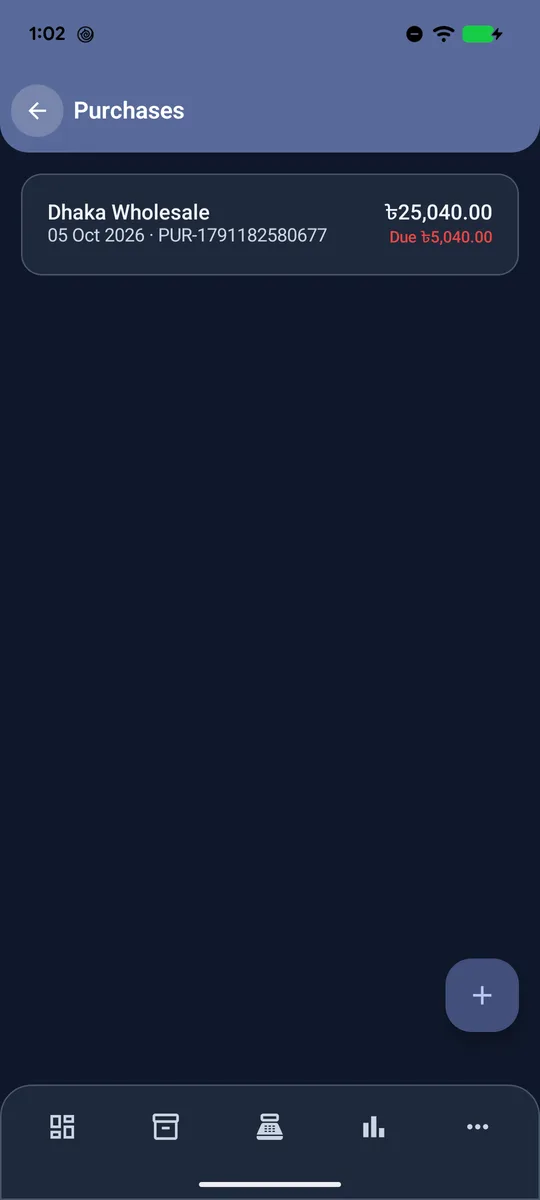
- Go to More › Purchases and tap New purchase.
- Choose the supplier. It's optional for market or walk-in purchases.
- For each line, pick the product and enter quantity, cost and selling price. Tap Add item for more lines.
- Enter how much you paid now. Anything unpaid is added to what you owe that supplier.
- Tap Save purchase. Stock goes up straight away.
Check and correct stock
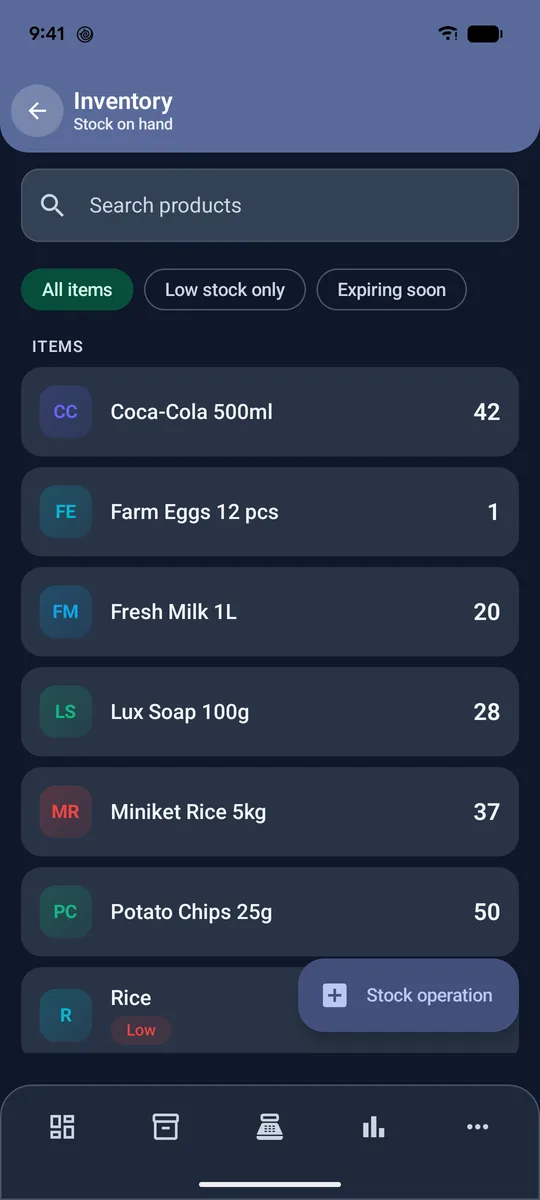
- Open More › Inventory to see what's on hand. Use Low stock only or Expiring soon to narrow the list.
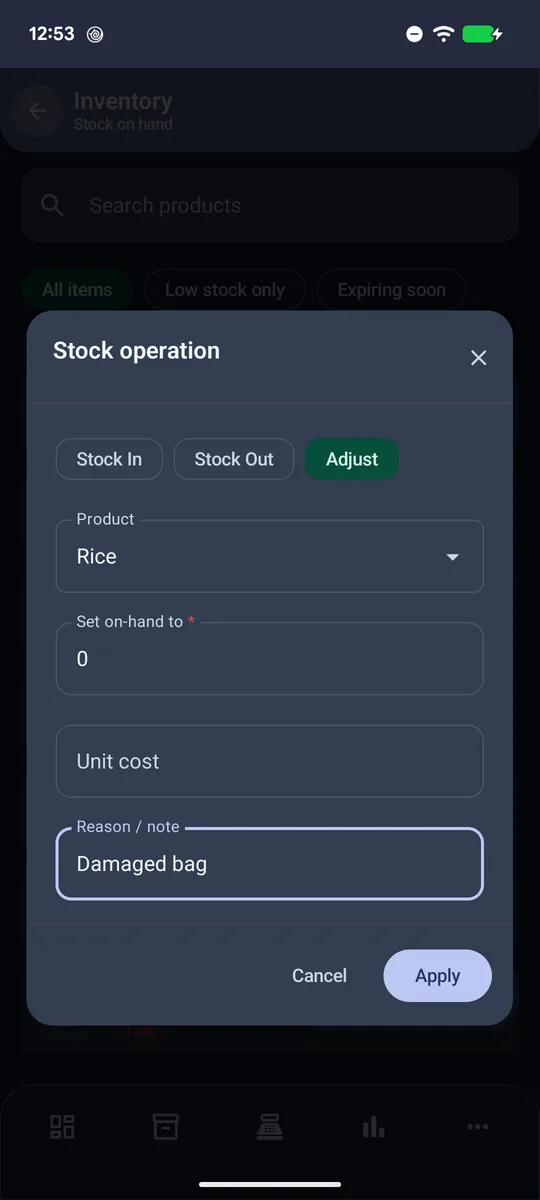
- Tap Stock operation to add stock (Stock In), remove damaged or lost items (Stock Out), set an exact count after counting the shelf (Adjust), or move stock to another branch (Transfer).
- Adjust can set a product to 0, for example when a whole batch is spoiled. Add a reason so you remember why.
Making a sale
The Sell screen is built for speed at a busy counter: tap products, check the cart, take the money.
Add items to the cart
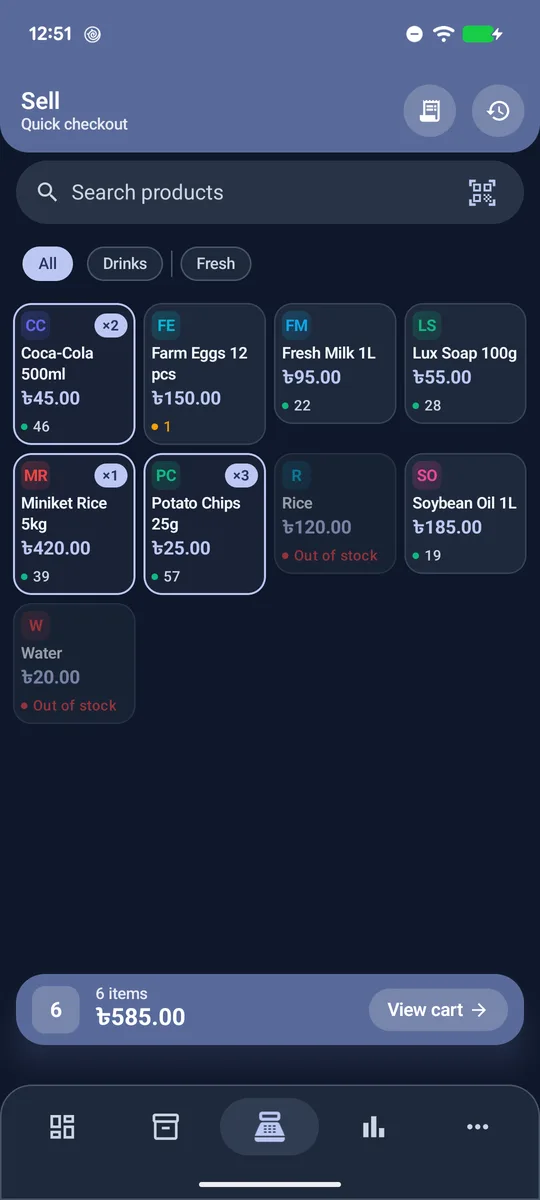
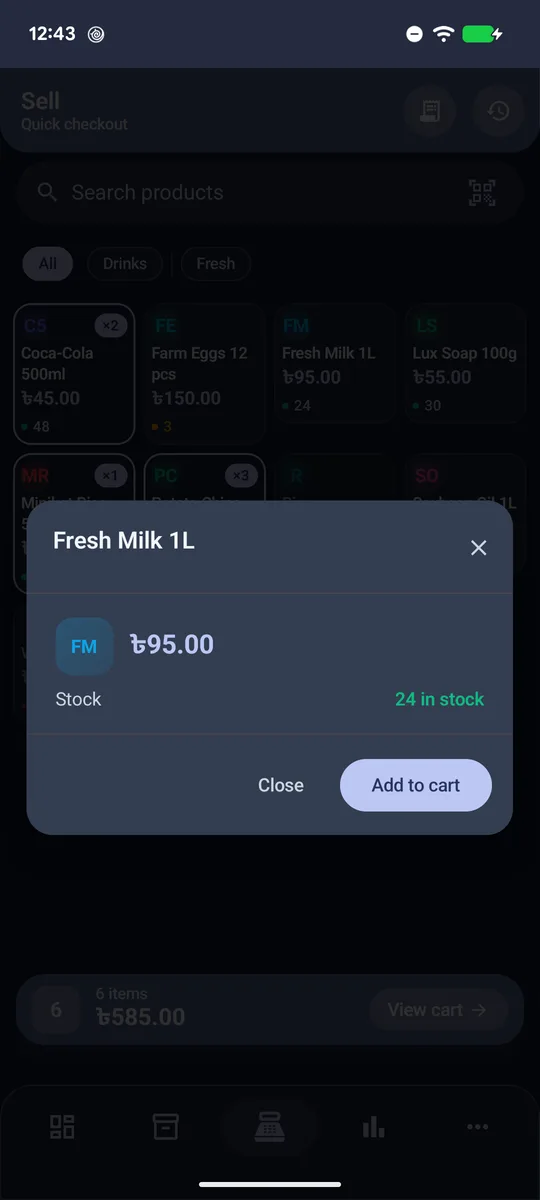
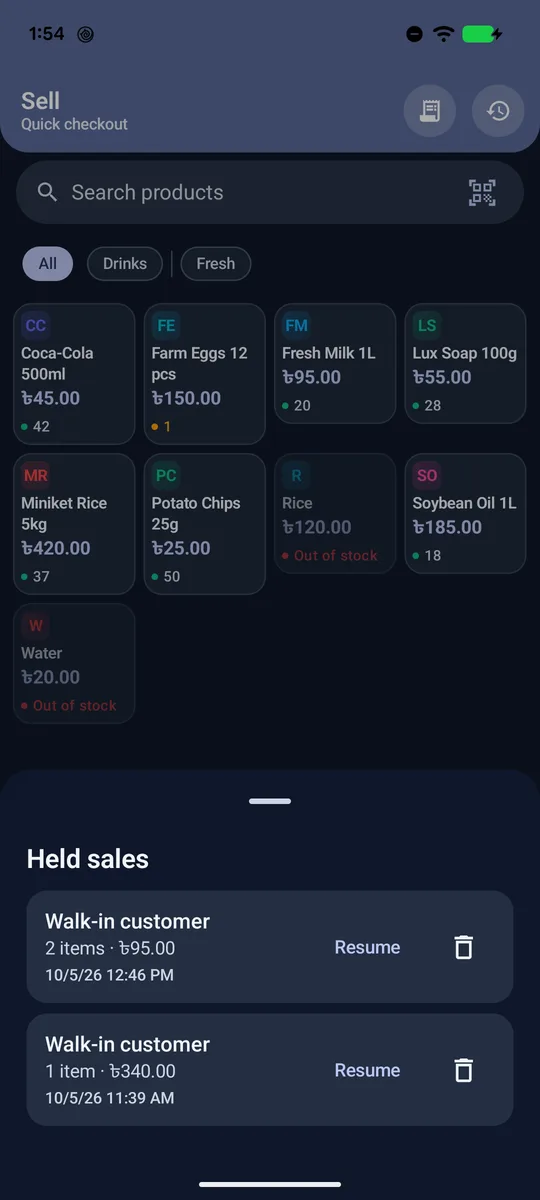
- Open Sell. Each tile shows the product's full name, price and stock: green is in stock, amber means 5 or fewer left, red is out of stock.
- Tap a tile to add one. Tap again to add more; the ×2 badge counts them.
- Search by name, scan a barcode with the scan icon, or use the chips (All, categories, brands) to filter.
- Press and hold a tile to see its details (price, stock, category) before adding it.
Check out
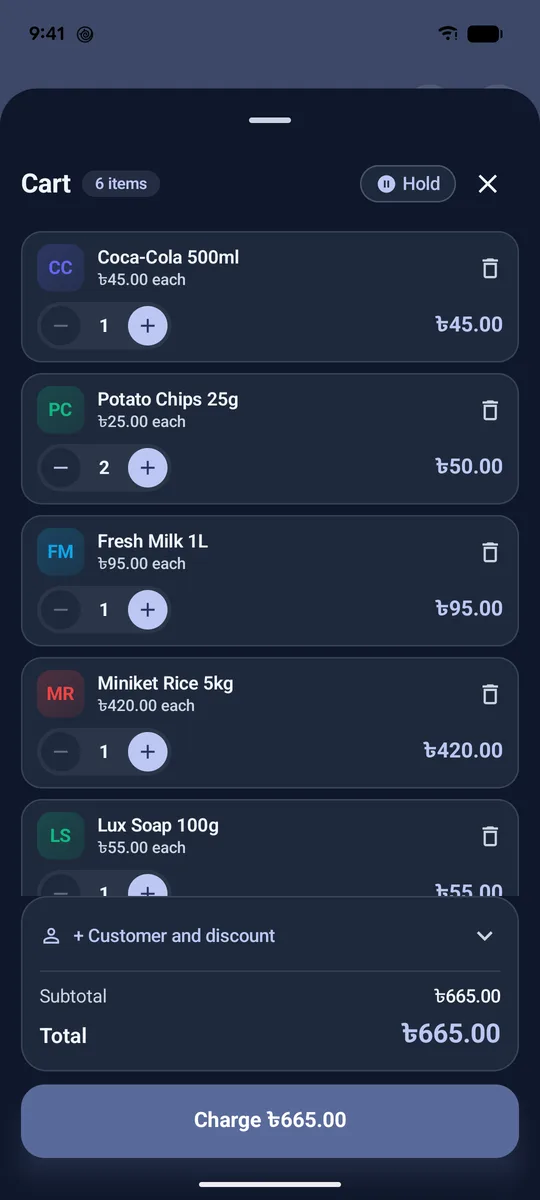
- Tap View cart. Use − and + to change quantities, or the bin icon to remove a line.
- Tap + Customer and discount to attach a customer or give a discount.
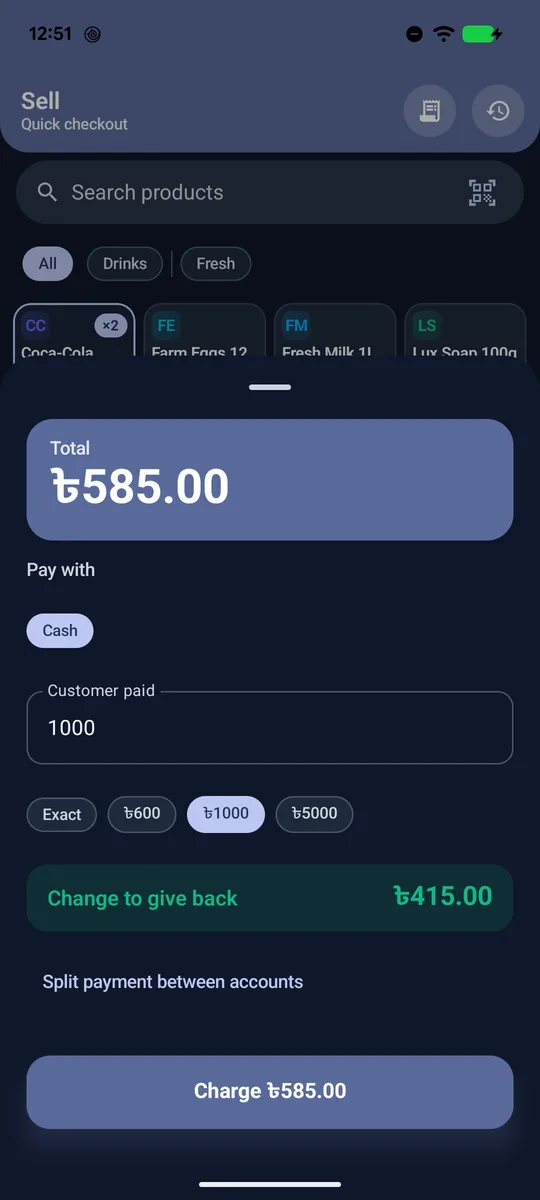
- Tap Charge. Choose how they paid (Cash, bKash, bank).
- Tap a quick-cash button (৳500, ৳1000…) or type what the customer handed you. Change to give back is calculated for you.
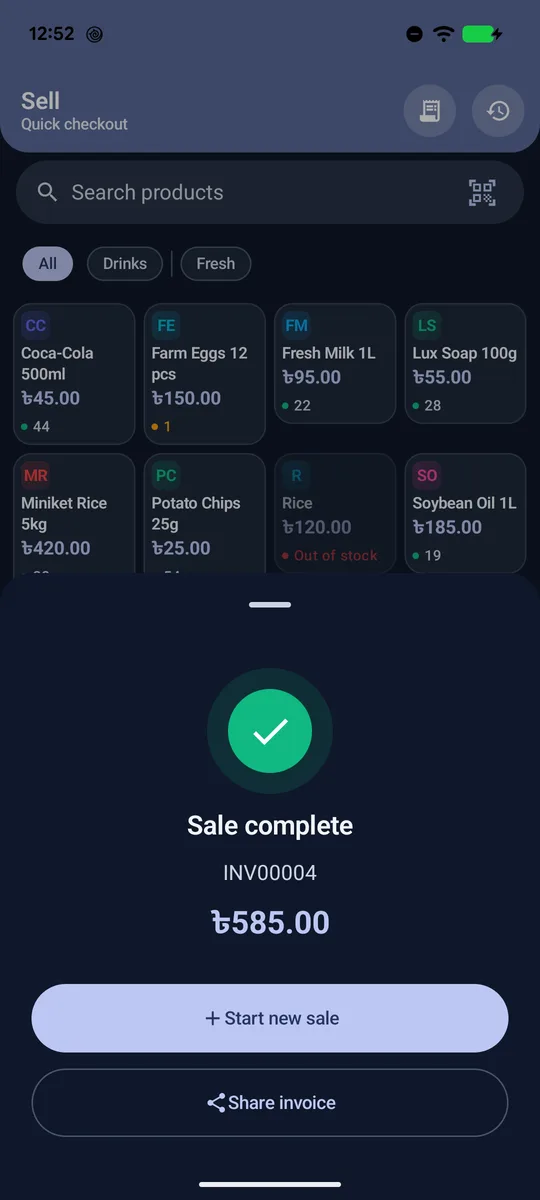
- Tap Charge again. Share the invoice, or start the next sale.
Held sales and history
- The clock icon (top right of Sell) lists held sales. Resume brings one back. If you already have items in the cart, they're held automatically so nothing is lost.
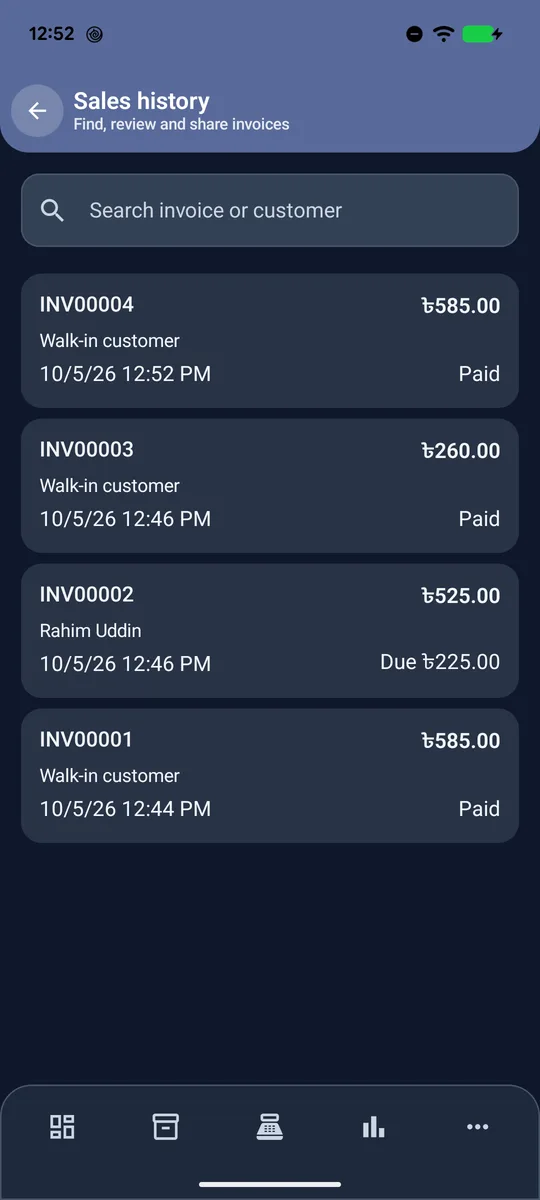
- The receipt icon opens Sales history: every invoice with the customer, time and whether it's paid or has a due. Search by invoice number or customer.
Selling on credit (বাকি)
Let a customer pay later
- In the cart, tap + Customer and discount › Change and pick the customer. A due can't be recorded for a walk-in customer.
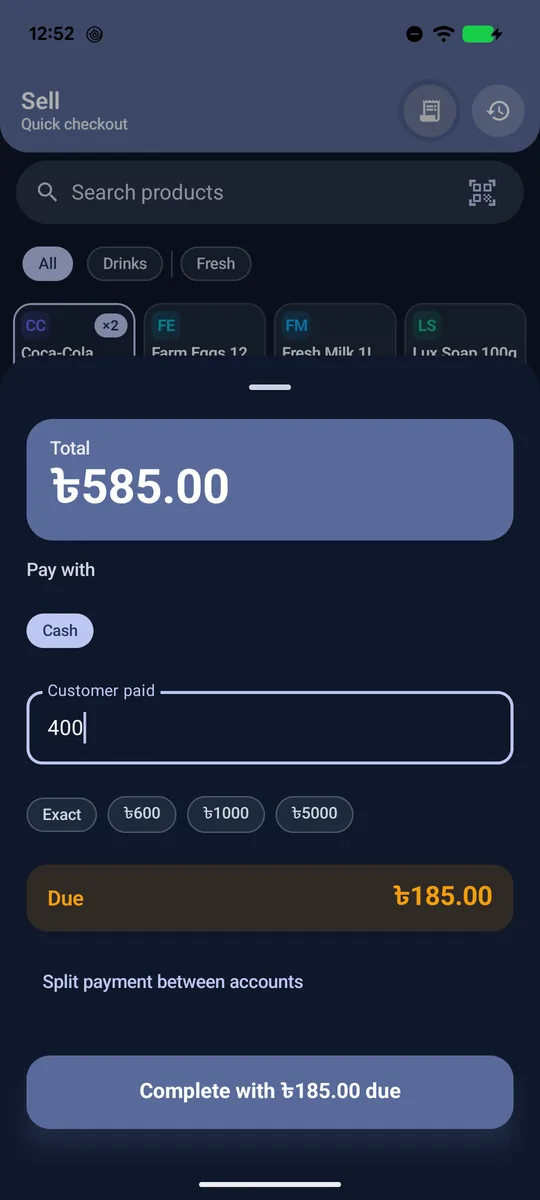
- On the payment screen, enter only what they paid now. The amber Due box shows what's left.
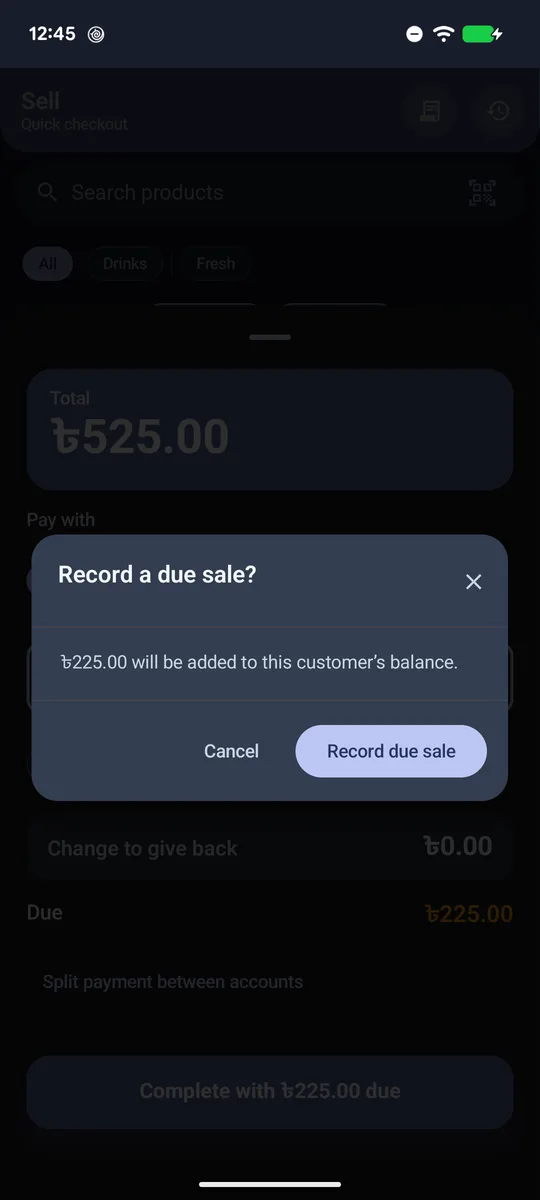
- Tap Complete with … due and confirm Record due sale. The amount is added to the customer's balance.
Customers and dues
Keep track of who owes what
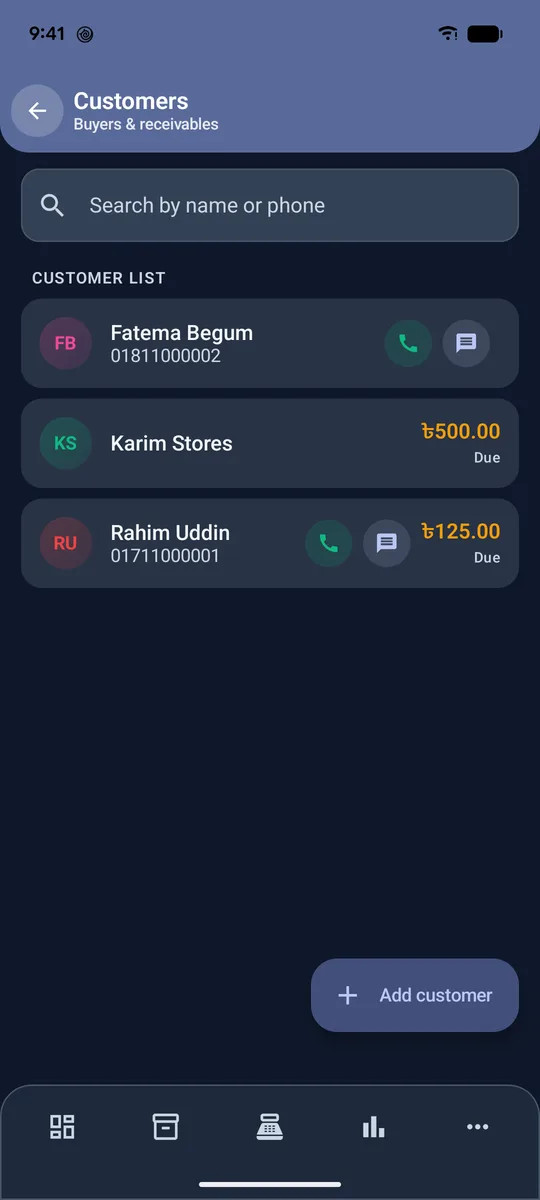
- More › Customers lists everyone, with their due in amber. Call or text a customer with the buttons on their row.
- Add customer needs only a name. Phone and an opening due (what they already owed before ShopPilot) are optional.
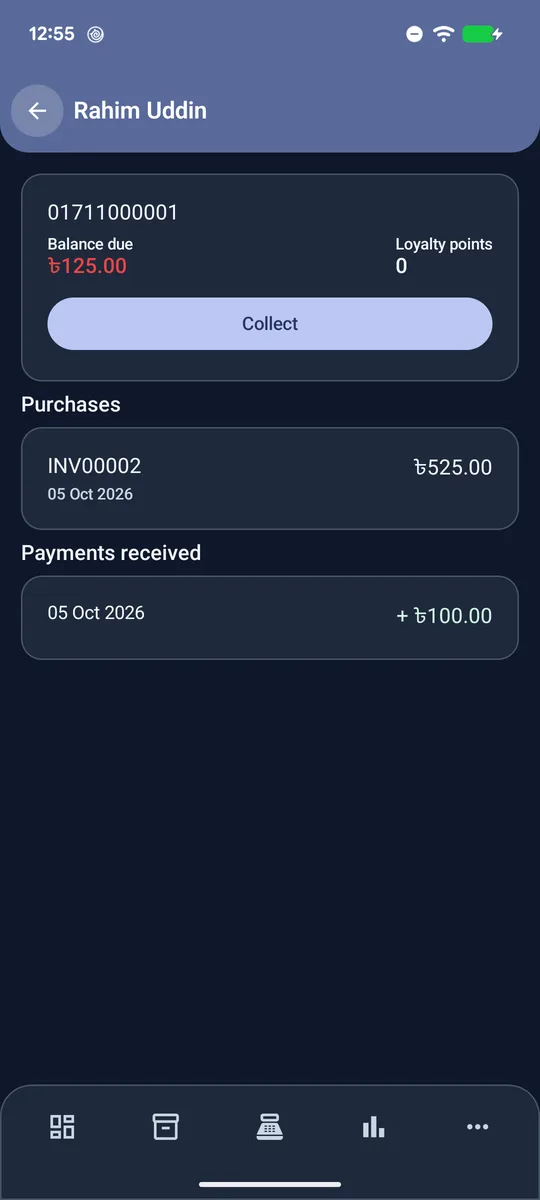
- Tap a customer for View details, Collect, Edit or Delete.
Collect a payment
- Open the customer and tap Collect.
- Enter the amount received and the account it went into, then tap Collect.
- Their balance drops and the payment appears under Payments received.
Suppliers
What you owe your suppliers
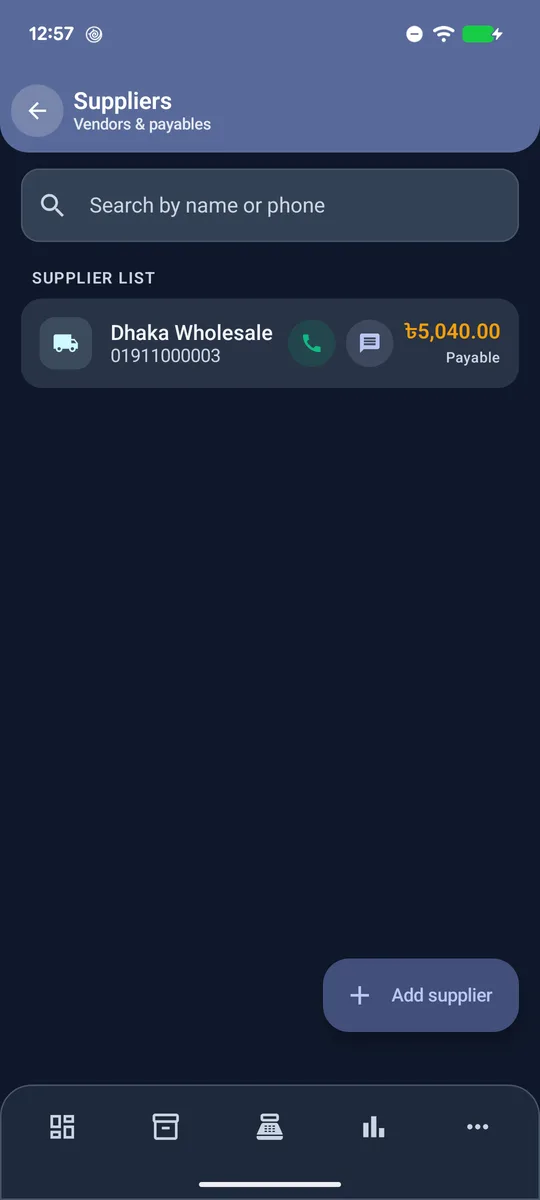
- More › Suppliers shows each supplier and their Payable, which grows with every purchase you don't fully pay.
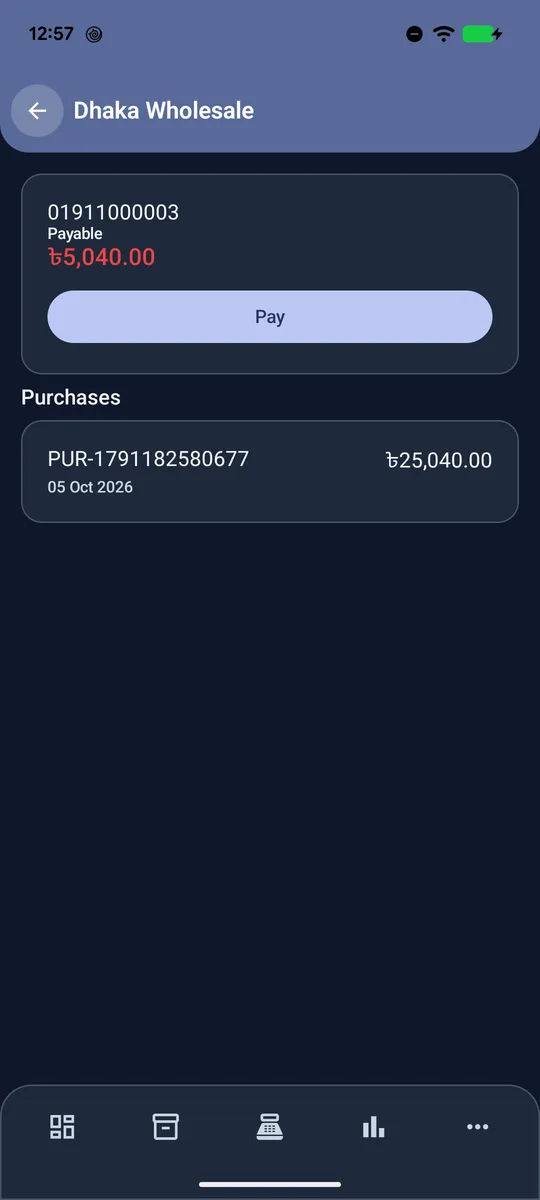
- Open a supplier to see their purchases and tap Pay when you settle up.
Accounts and expenses
Accounts
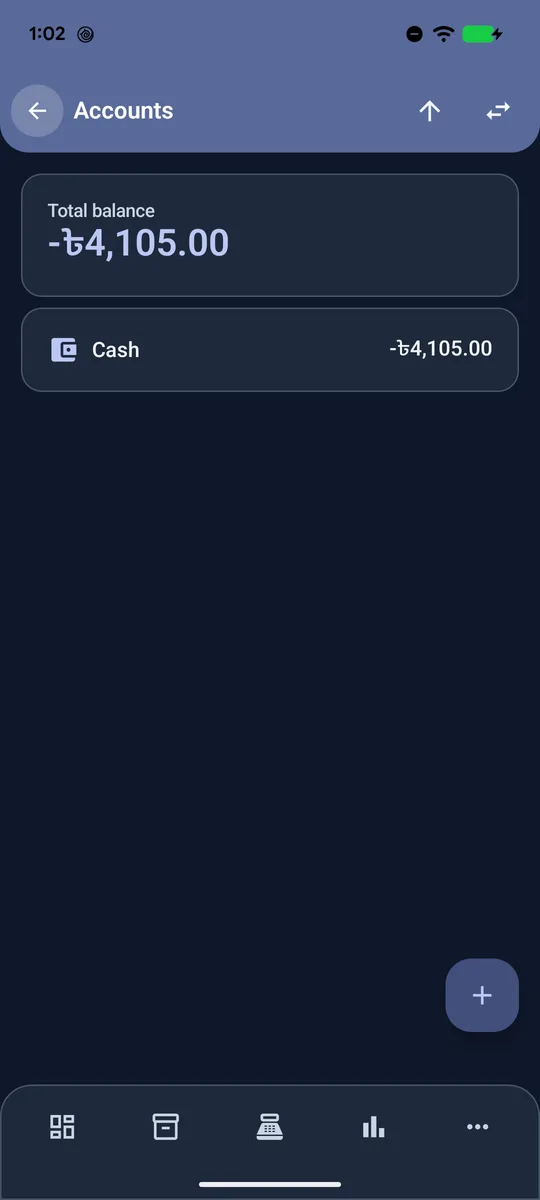
- More › Accounts holds your cash drawer, bKash, Nagad or bank accounts and their balances.
- Use + to add an account with an opening balance, the arrows icon to move money between accounts, and the up-arrow to record an owner withdrawal.
Expenses
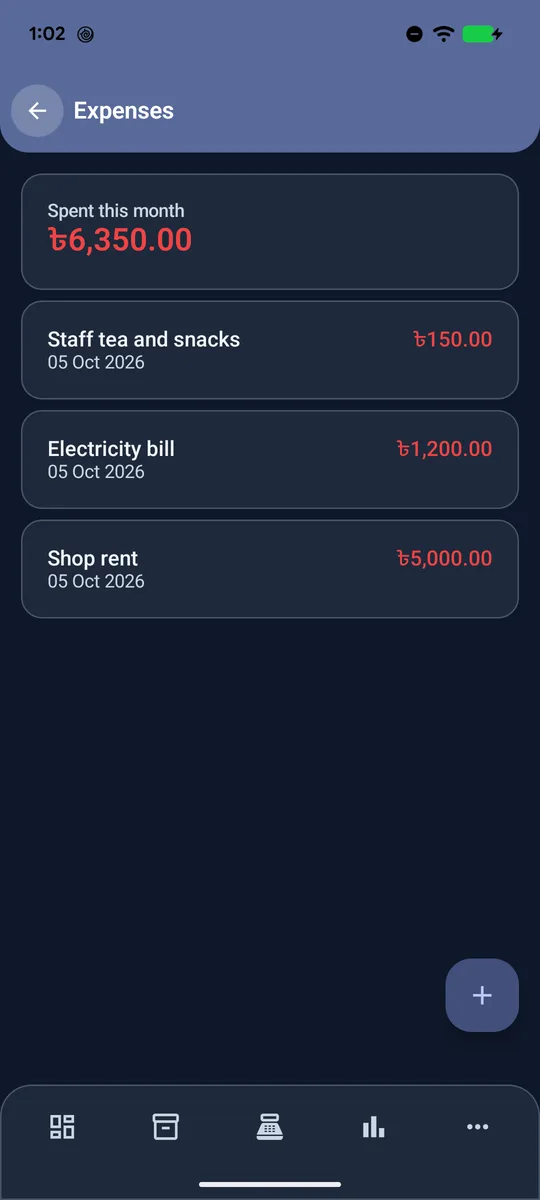
- Open More › Expenses and tap +.
- Write what it was for (rent, electricity, salary), the amount, and which account paid it.
- Tap Save. Spent this month at the top keeps a running total.
Reports
See how the business is doing
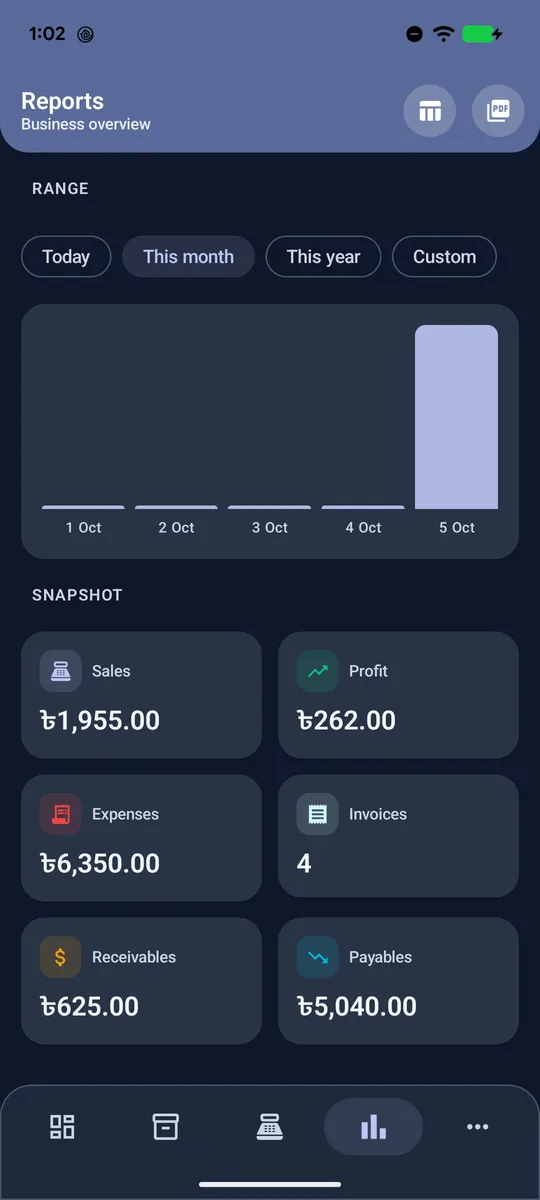
- Pick Today, This month, This year or Custom dates.
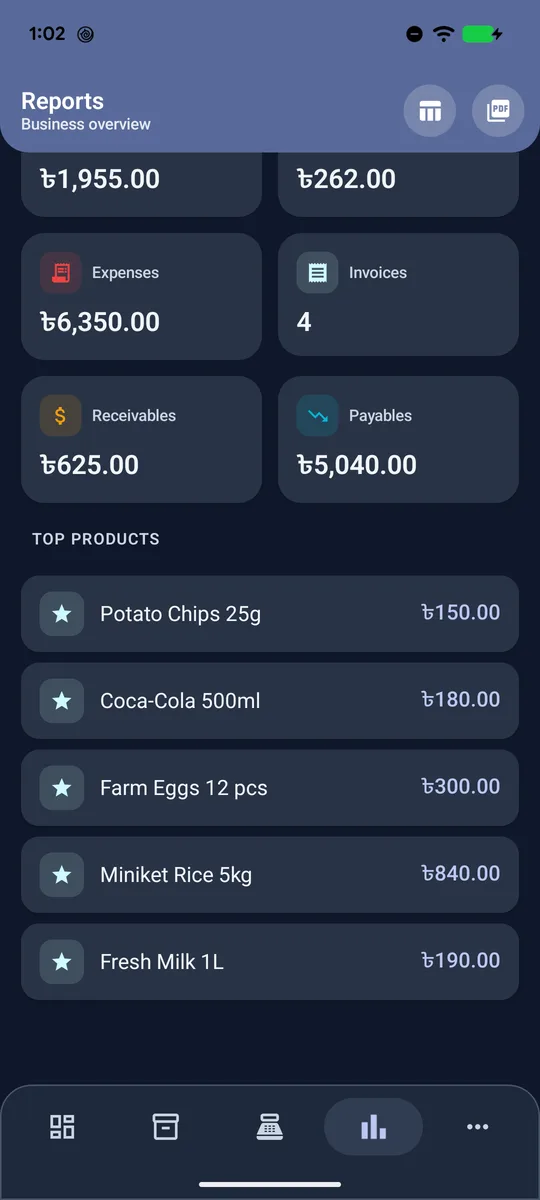
- The chart shows sales over the range. Snapshot gives sales, profit, expenses, invoice count, receivables and payables.
- Top products ranks your best sellers by revenue.
- The two icons at the top export the report as a spreadsheet (CSV) or PDF to share or print.
More tools
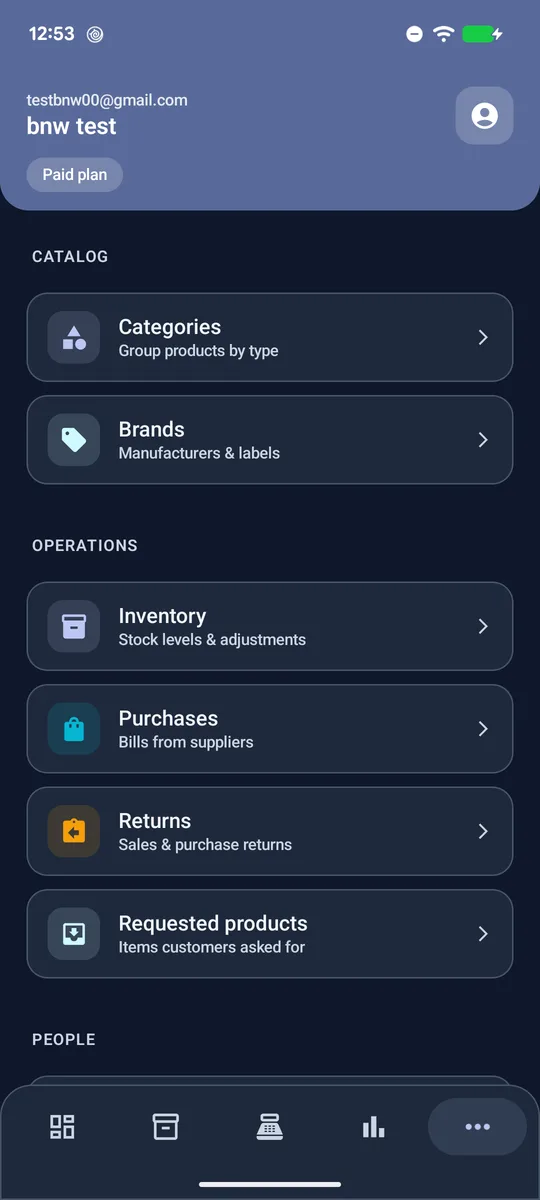
Everything else lives under More
- Categories and Brands group products so the Sell screen filters work.
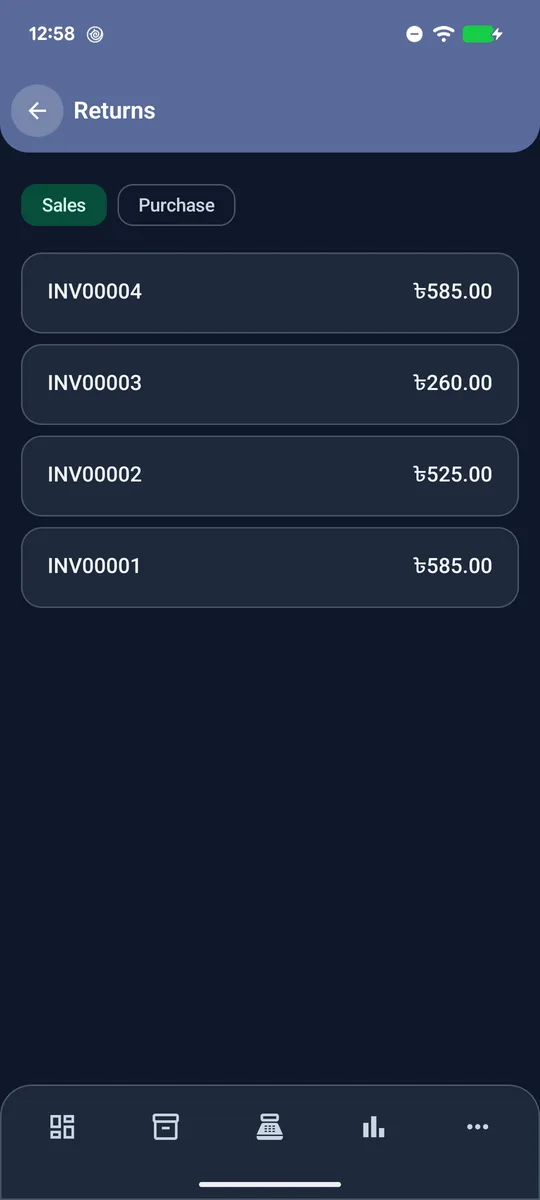
- Returns: take back items from a sale (refund the customer) or send items back to a supplier.
- Requested products: note items customers asked for that you don't stock, so you know what to buy next.
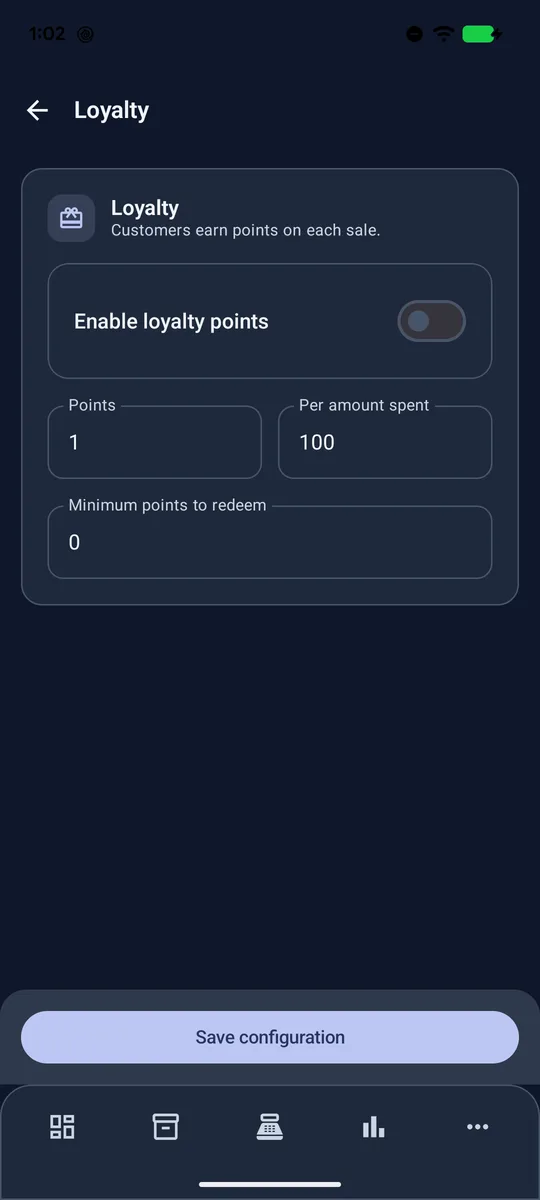
- Loyalty: give customers points per amount spent and let them redeem points at checkout.
- Branches: add shops and switch between them. Sync connects this phone to your shop's cloud account with a branch code.
Settings and backup
Make the app yours
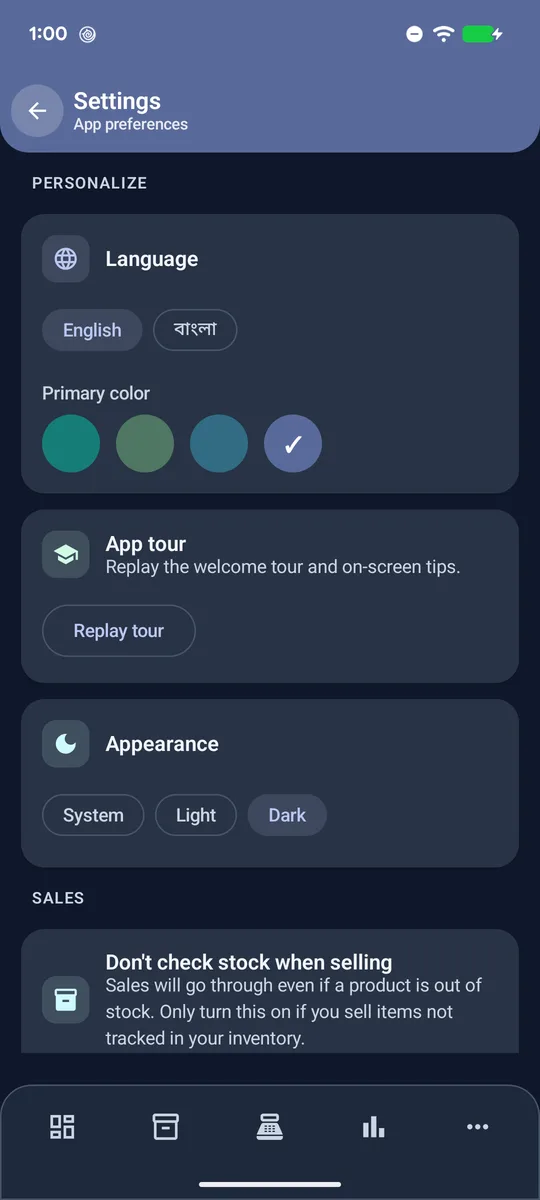
- Switch Language between English and বাংলা, pick a Primary color, and choose Light, Dark or System Appearance.
- Don't check stock when selling: turn this on only if you sell items you don't track in inventory.
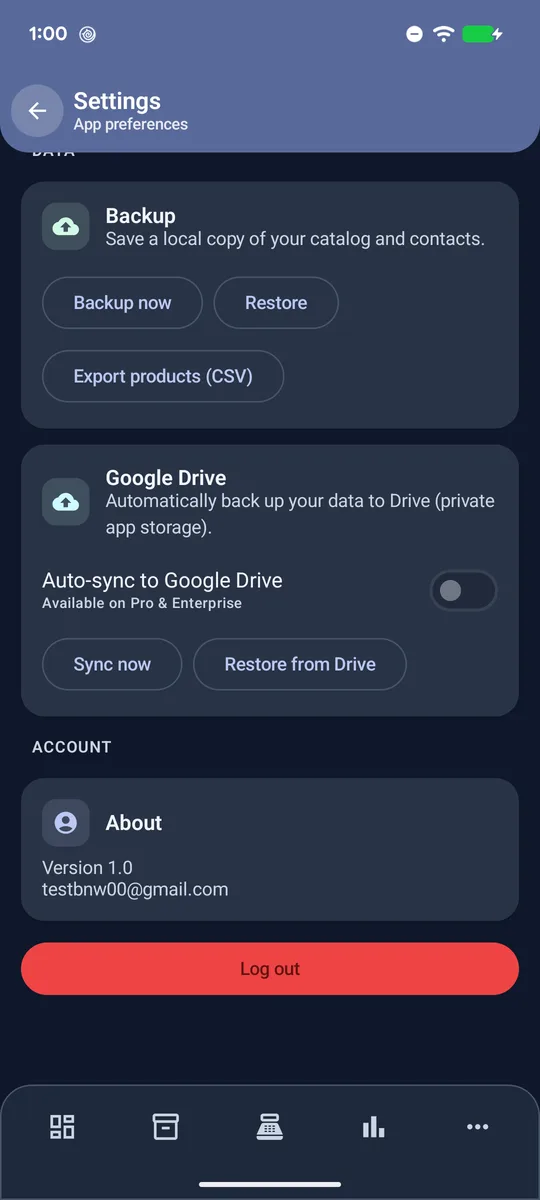
- Backup now saves a copy of your data you can keep or share; Restore brings it back. Export products (CSV) gives you a spreadsheet of your catalog.
- Google Drive backs up automatically on Pro and Enterprise plans.
- Remove ads: choose a monthly plan or a one-time lifetime purchase.
On a tablet or sideways
Turn your phone sideways or use a tablet and ShopPilot shows more product tiles per row, with the menu on the left. On a tablet, the cart sits next to the products so you never leave the Sell screen.
Questions
A product shows “Out of stock” but I have it on the shelf.
Its stock was never added. Record a purchase, or use Inventory › Stock operation › Stock In or Adjust to set the real count.
Why can't I record a due for a walk-in customer?
An unpaid balance needs a name to be collected later. Pick or add the customer in the cart first.
I scanned a barcode and nothing was added.
A message tells you no product has that code. Open the product in Catalog and add the barcode to it, then scan again.
Does it work without internet?
Yes. Sales, stock, customers and expenses are stored on the phone. Connect to the internet to sync, back up to Drive, or buy a plan.
How do I see what a customer owes in total?
The Dashboard's Receivables card and the Reports snapshot show the total for all customers. Each customer's own due is on their row in Customers.