A clear guide to your counter.
From your first booking to the last receipt of the day. Step-by-step instructions, real app screenshots, and practical answers for your team.
Based on the current Android project · Demo screenshots · Updated September 2026
Set up your business
Restra is an Android app for running hotel rooms, restaurant tables and service sales on one device. Everyday bookings, billing and payment records work offline. Online account and sync features are optional.
- Open Restra and select Set up Restra.
- Choose the business type and modules that match your operation: hotel, restaurant, both, or services as available.
- Enter your business profile, including its name, contact details and currency. Review the details that will appear on customer documents.
- Configure service charge, VAT, whether prices include charges, and rounding. Use the settings appropriate to your business.
- Choose whether to protect configuration with a 4–6 digit config PIN. If enabled, keep the recovery code somewhere safe.
- Use quick setup to add the initial rooms or menu and tables offered for your business type. Finish any remaining configuration in More → Setup.
Find your way around
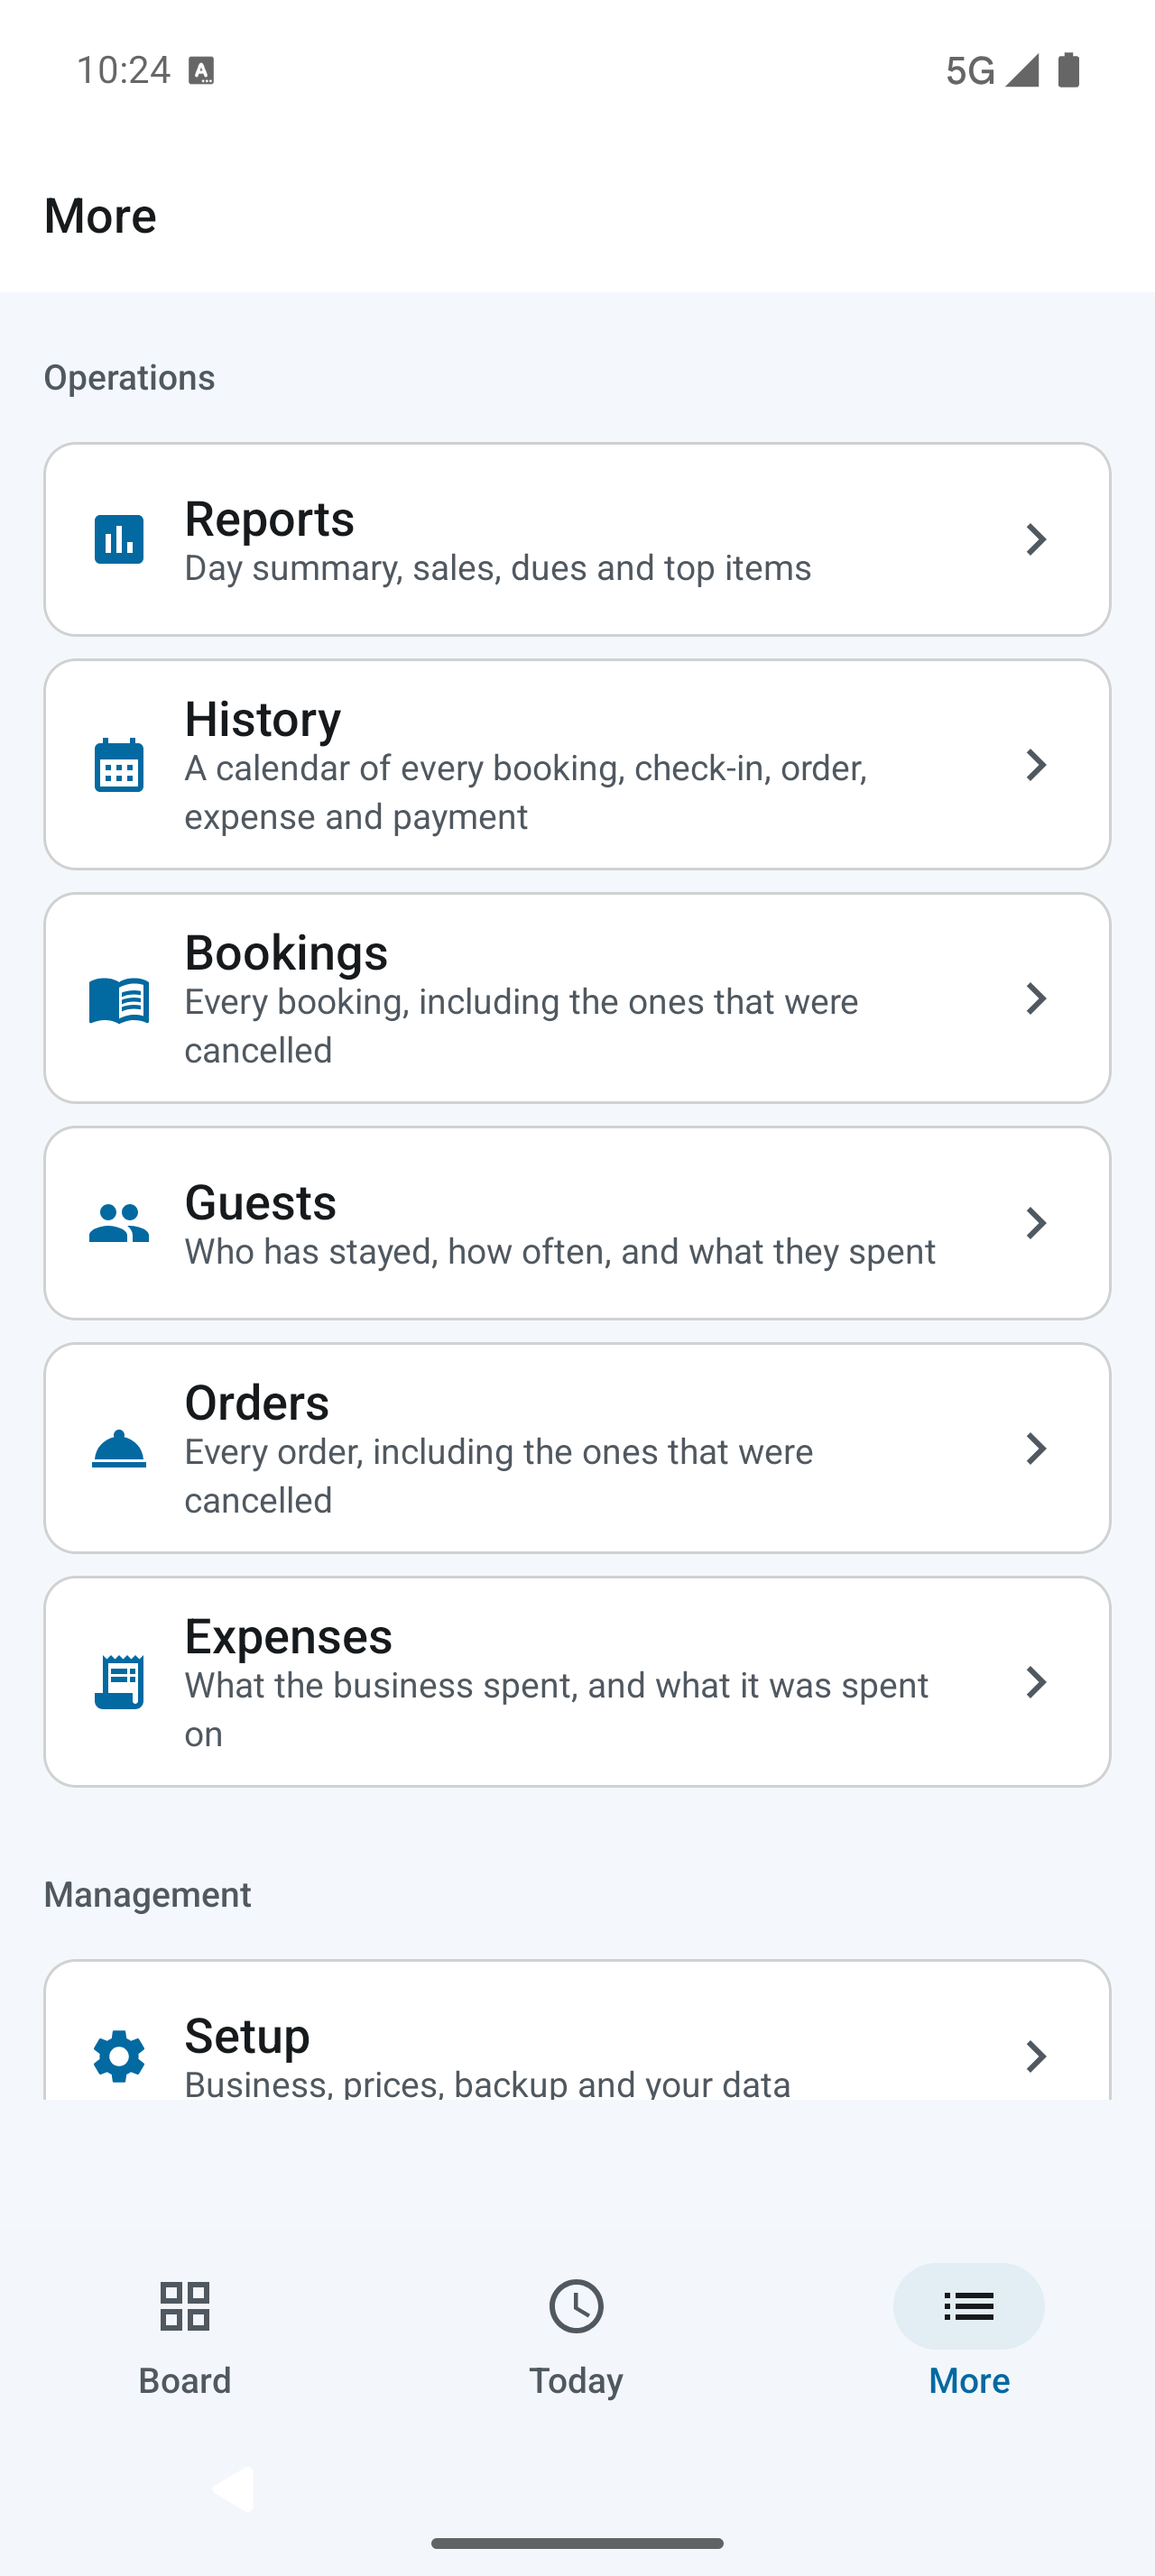
The bottom navigation keeps three main areas within reach.
- Board / Rooms / Tables / Services: your operational starting point. Its name and available views depend on your business modules. In a combined business, use the selector at the top.
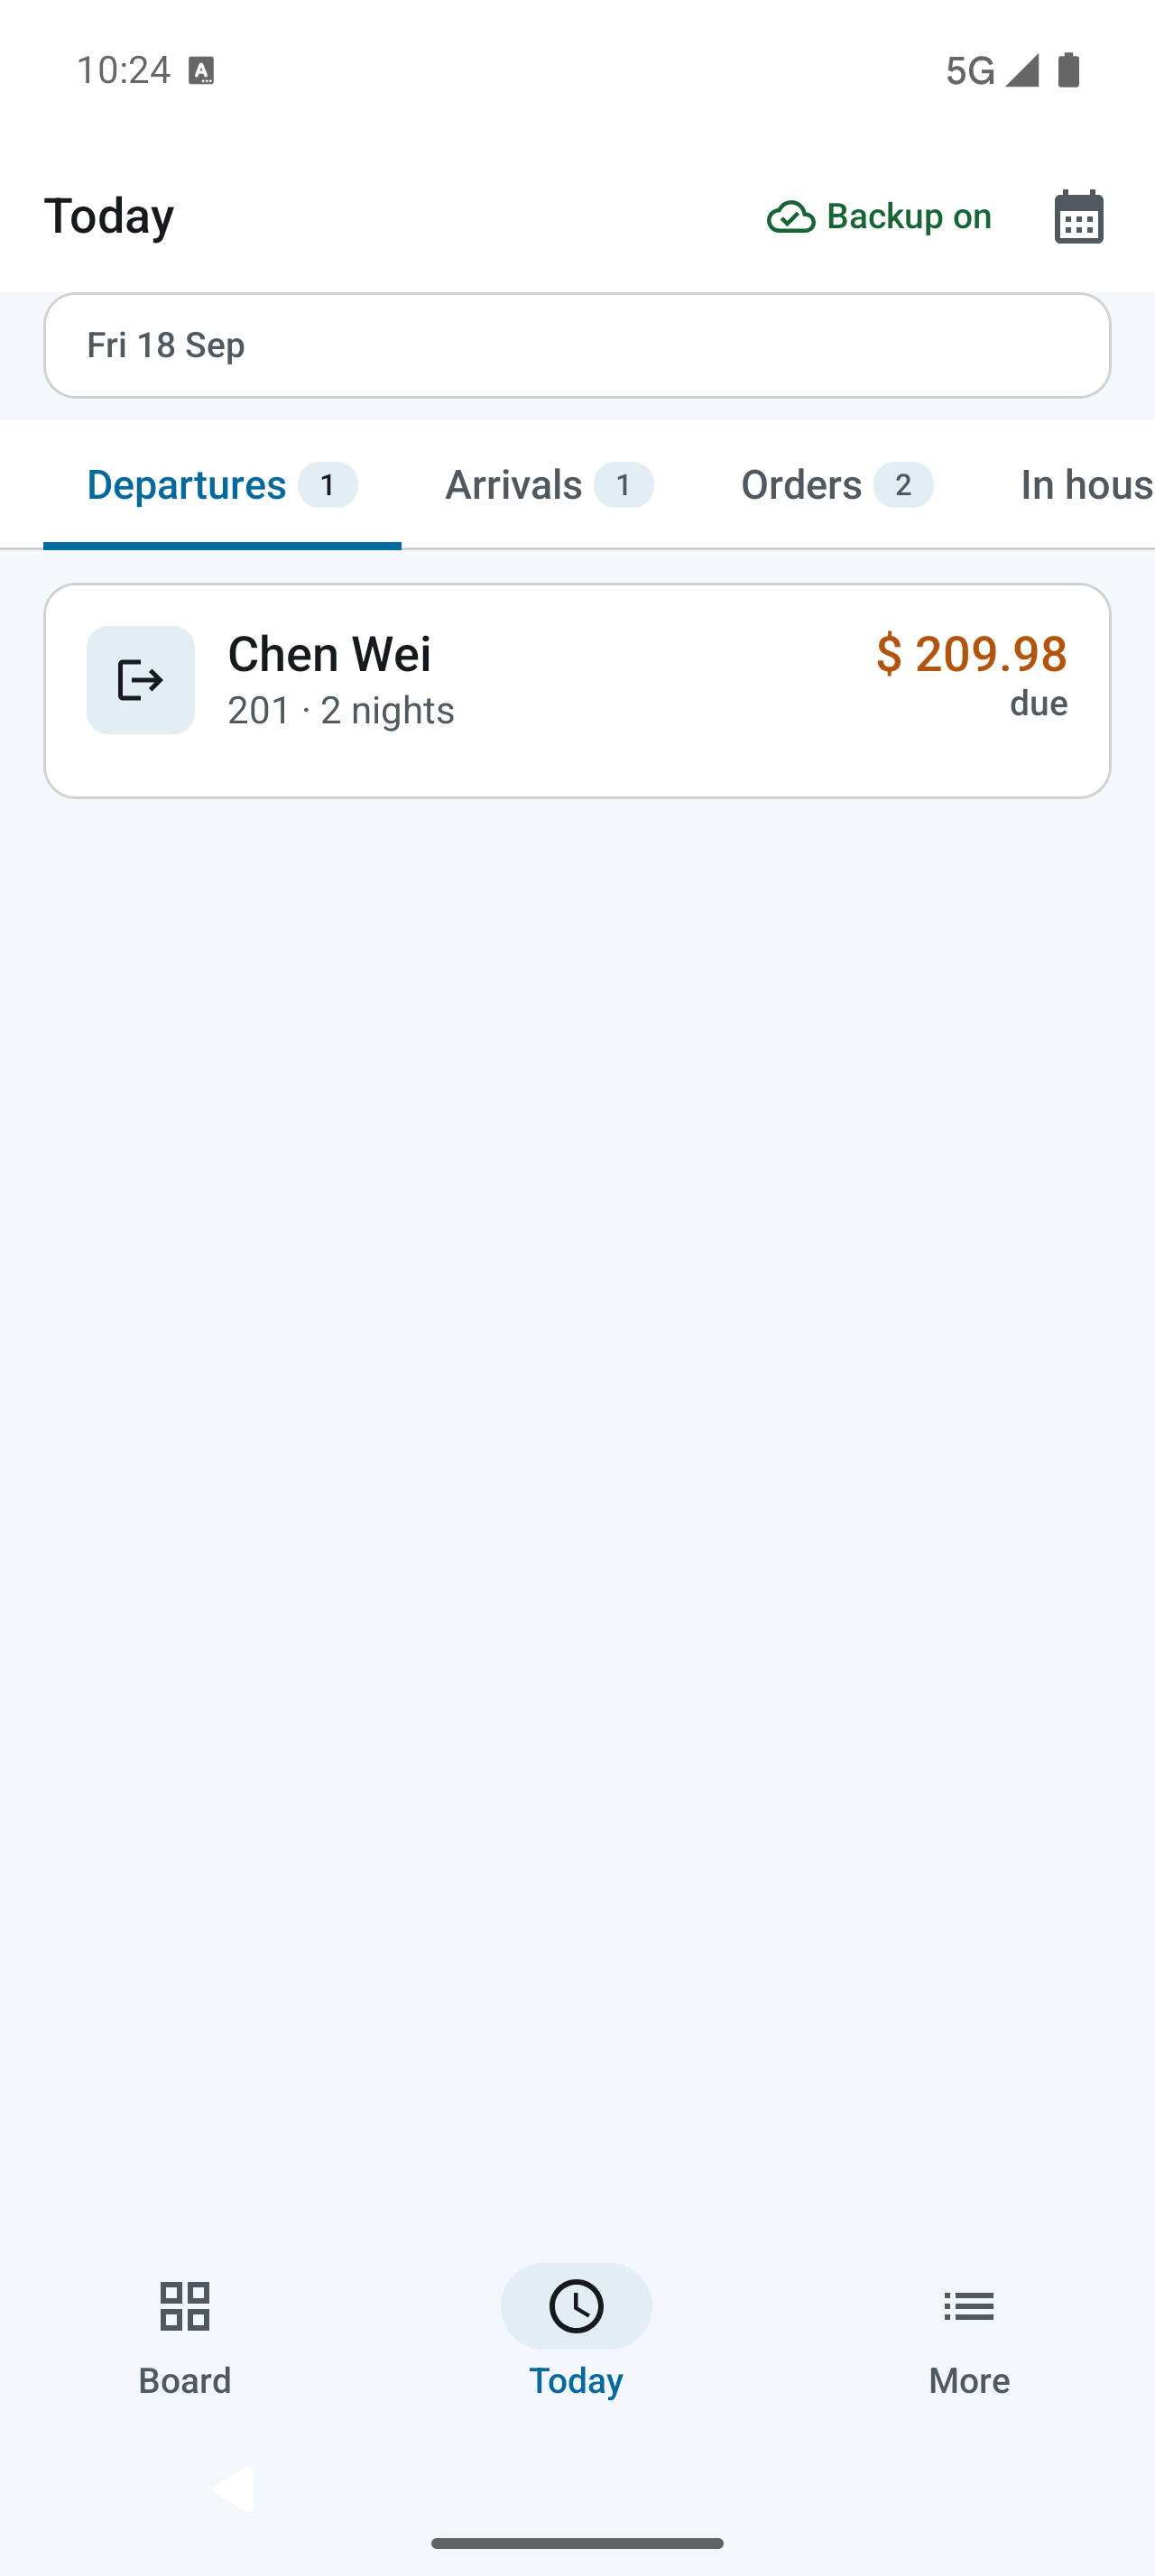
- Today: the current day’s operational overview and available daily actions.
- More: reports, history, bookings, guests, orders, expenses, business setup, app settings and the optional account.
More → Setup changes business configuration. It asks for your config PIN if one is enabled. More → App settings changes appearance, language and text size without the business PIN.
Manage rooms and availability
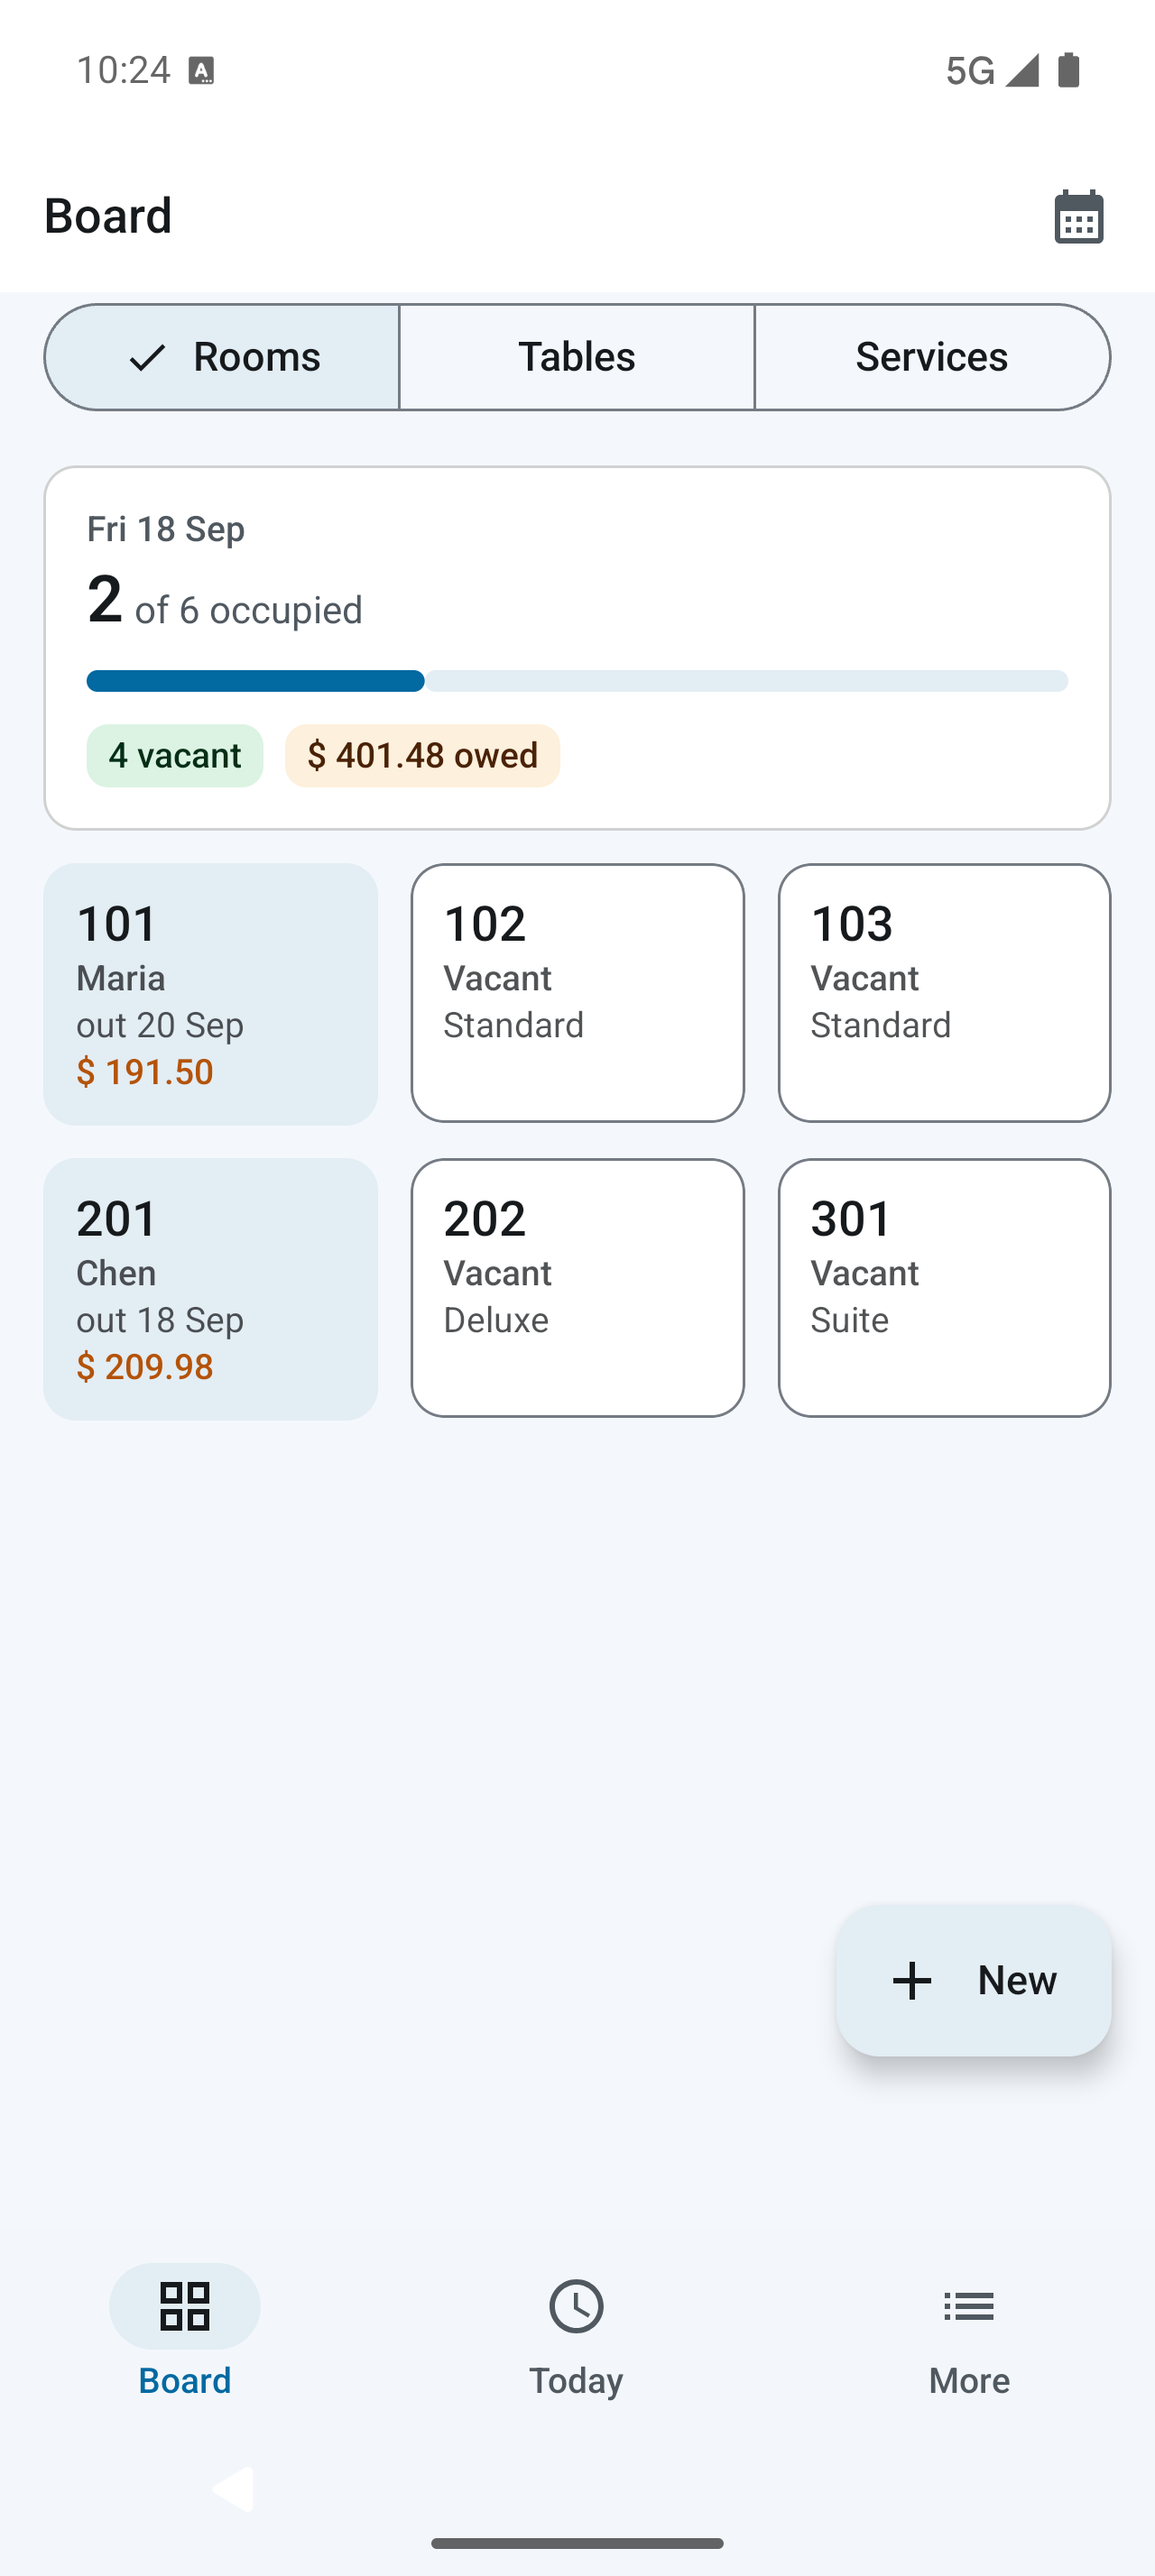
Open More → Setup → Room, day and date prices to configure room types, rooms and rates. Return to the room board to see occupied and vacant rooms.
- Select a room to open its available actions.
- For an occupied room, choose View folio to open the guest’s bill, or the checkout action to begin departure.
- Use the cleanliness action when housekeeping finishes. A dirty room must be marked clean before check-in.
- Use the date selector to inspect availability for the dates you need.
How room prices are chosen
A typed manual rate takes priority, followed by a date price, a day price, and finally the base price. Review each night on a booking before saving. A typed rate is retained even when setup prices change later.
If a room is out of service, occupied, or already booked for the requested nights, choose another room or change the dates.
Create and manage a booking
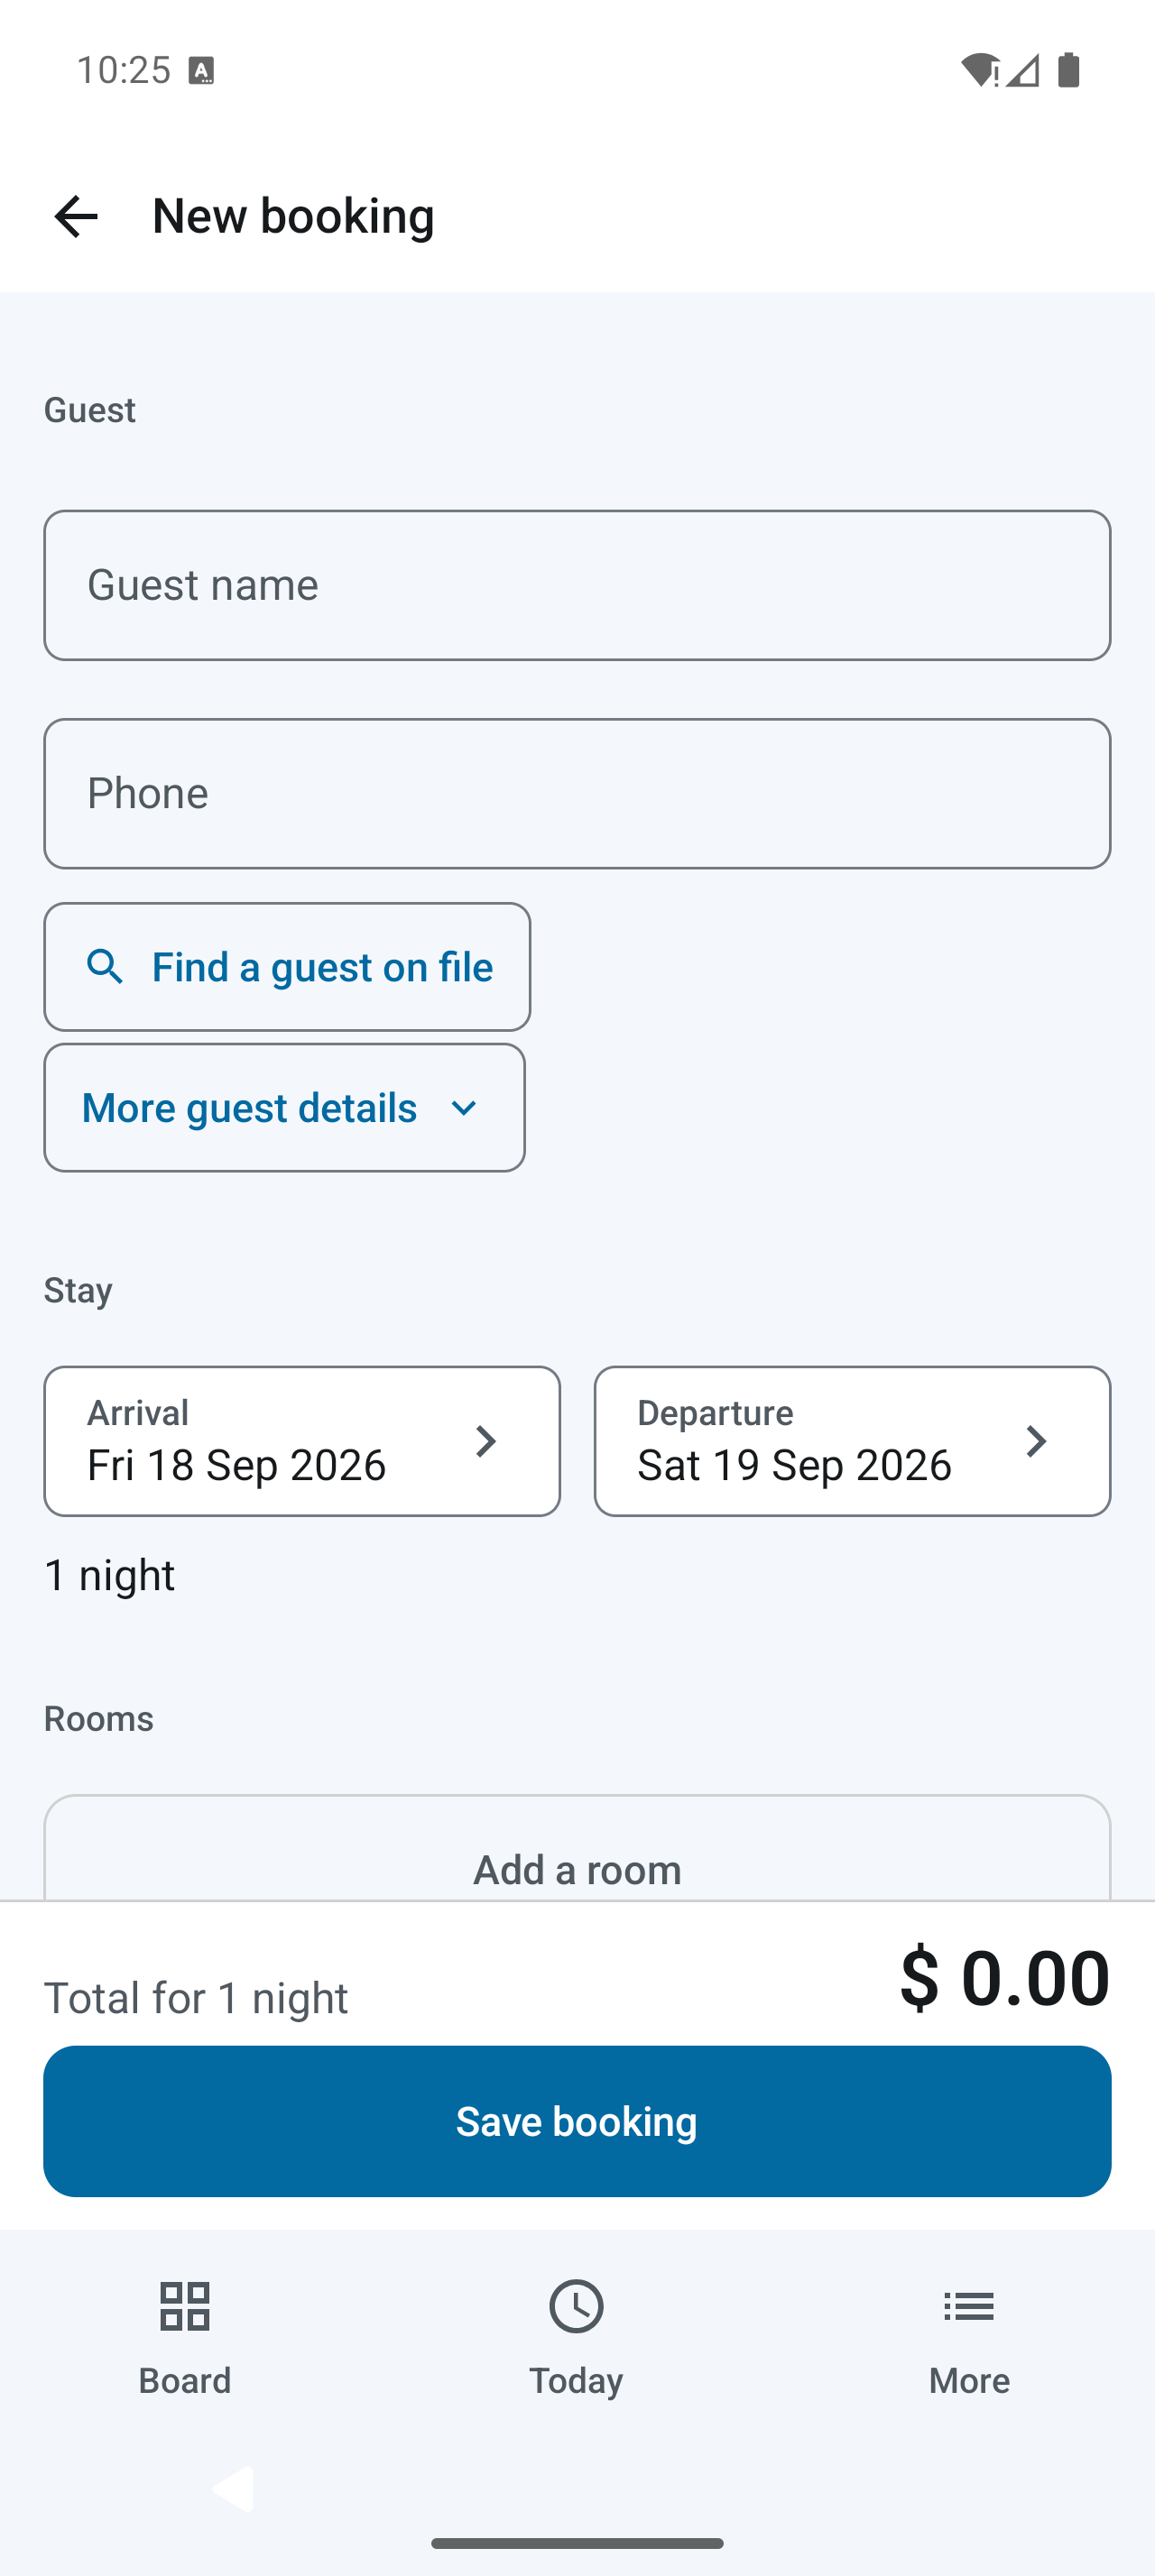
- From the board, select New → Booking, or use an available room’s booking action.
- Enter Guest name and Phone. Use Find a guest on file for a returning guest. Expand More guest details for ID, address, nationality and notes. Enter ID details if the property requires them.
- Set Arrival and Departure; departure must be after arrival.
- Select Add a room. Choose a specific available room or an available room type to assign before check-in.
- Review nightly rates. Select a night to enter a manual rate. Use Give a discount for an agreed reduction; the discount percentage and agreed price are linked.
- Under More details, record the booking source, any advance received and booking notes.
- Check the total and select Save booking. Use Share confirmation if the guest needs a PDF.
Change, cancel or mark a no-show
Find the record in More → Bookings. Edit eligible bookings and review the “What will change” summary before saving. Cancellation and no-show actions release the rooms; review the confirmation before continuing.
Check in a guest
- Open the guest’s booking from More → Bookings or an available arrival entry.
- Confirm the dates and guest information, then select Check in.
- If the booking holds a room type, assign a specific room. The room must be available and clean.
- If an advance was received, confirm its payment method.
- Review any early-arrival price change before confirming. The stay opens with its own folio.
If check-in is blocked, follow the message: clean the room, complete the previous guest’s checkout, select another room, or resolve a conflicting booking.
What is a folio?
A folio is the running bill for a stay. It brings together room charges, extra charges, eligible orders charged to the room, payments and the remaining balance.
Manage the stay and check out
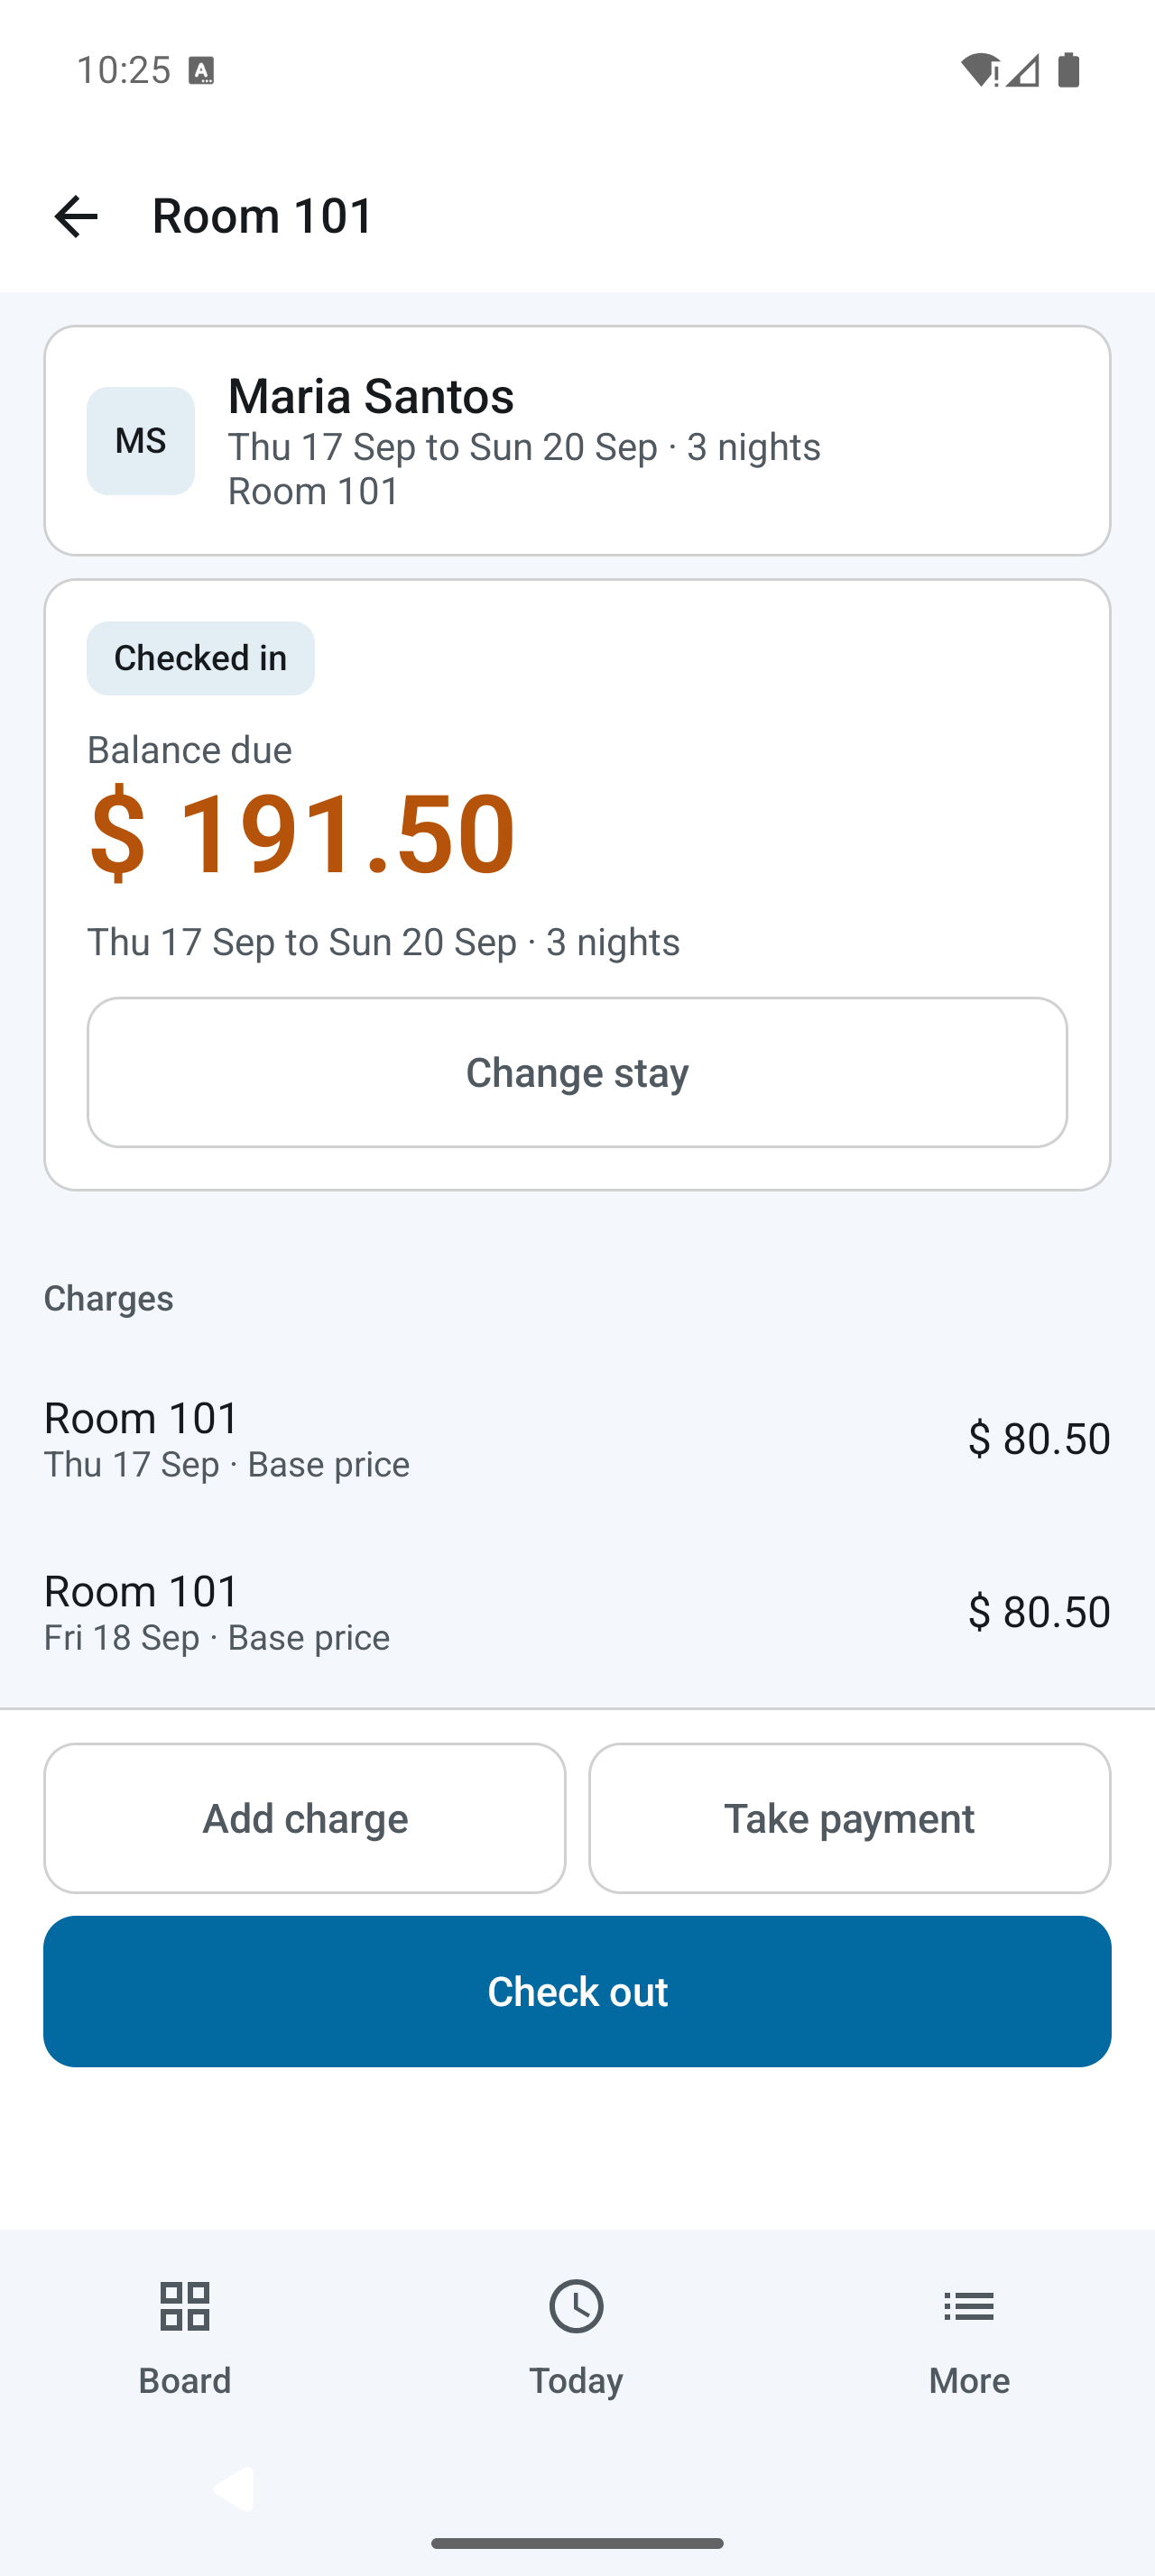
- Select an occupied room, then View folio.
- Review the guest, stay dates, charges and Balance due.
- Use Add charge for an extra such as laundry. Enter what it is for, its price and quantity.
- Use Change stay to adjust an eligible stay. Review any rate changes before saving.
- Select Take payment when money is received. See the payment instructions below.
- Select Check out after reviewing the balance. A settled checkout makes the invoice and releases the rooms.
If money is still owed, take payment first or use the explicit Check out with … due action. If the guest has a credit balance, refund the excess before checkout.
Take restaurant orders
Prepare the menu
In More → Setup → Menu and prices, create categories, dishes, variants and prices, and configure your restaurant tables. Mark unavailable dishes sold out when necessary.
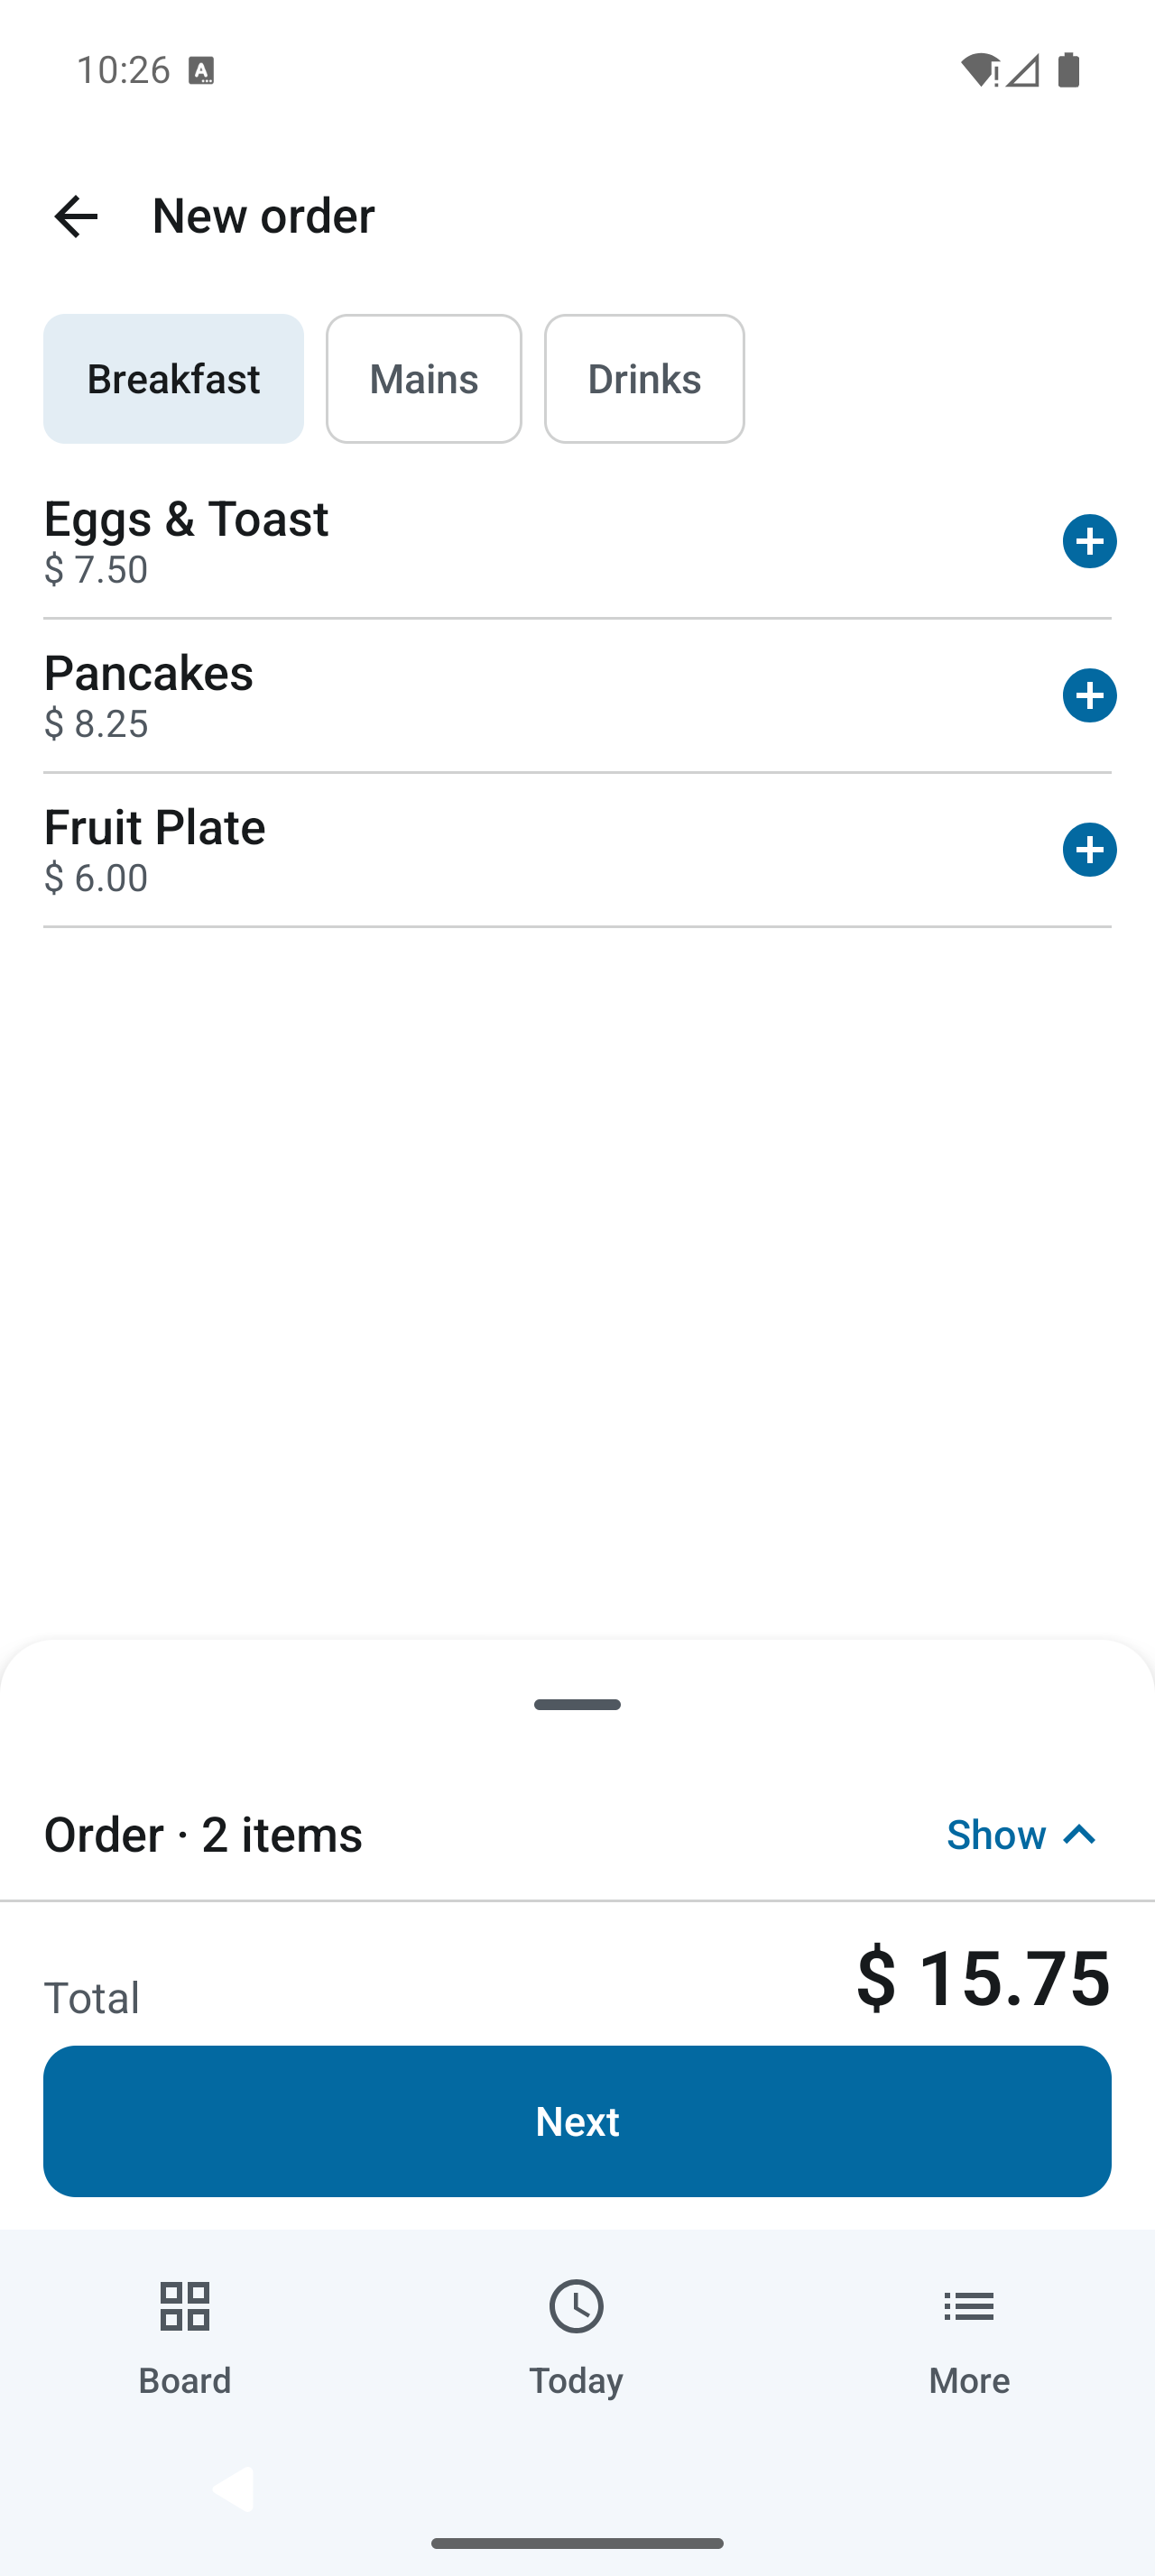
- Open the Tables board. Select a table or the Order action.
- Select the relevant menu category and add dishes. Choose a variant where offered, then review quantities and notes.
- Use Next in the new-order flow to review order details, customer and order type. Complete the prompted action to open the order.
- For an existing table order, select the table and then the customer’s order.
- Use the kitchen-ticket action to share dishes, quantities and notes without prices.
- Review the bill, then take and record payment. Share the bill or payment receipt as needed.
Dine-in and takeaway workflows are available in restaurant mode. Room-service and charge-to-room actions require the hotel module and an eligible checked-in guest.
Charge an order to a room
For a business with hotel and restaurant modules, restaurant charges can be settled through the guest’s room folio.
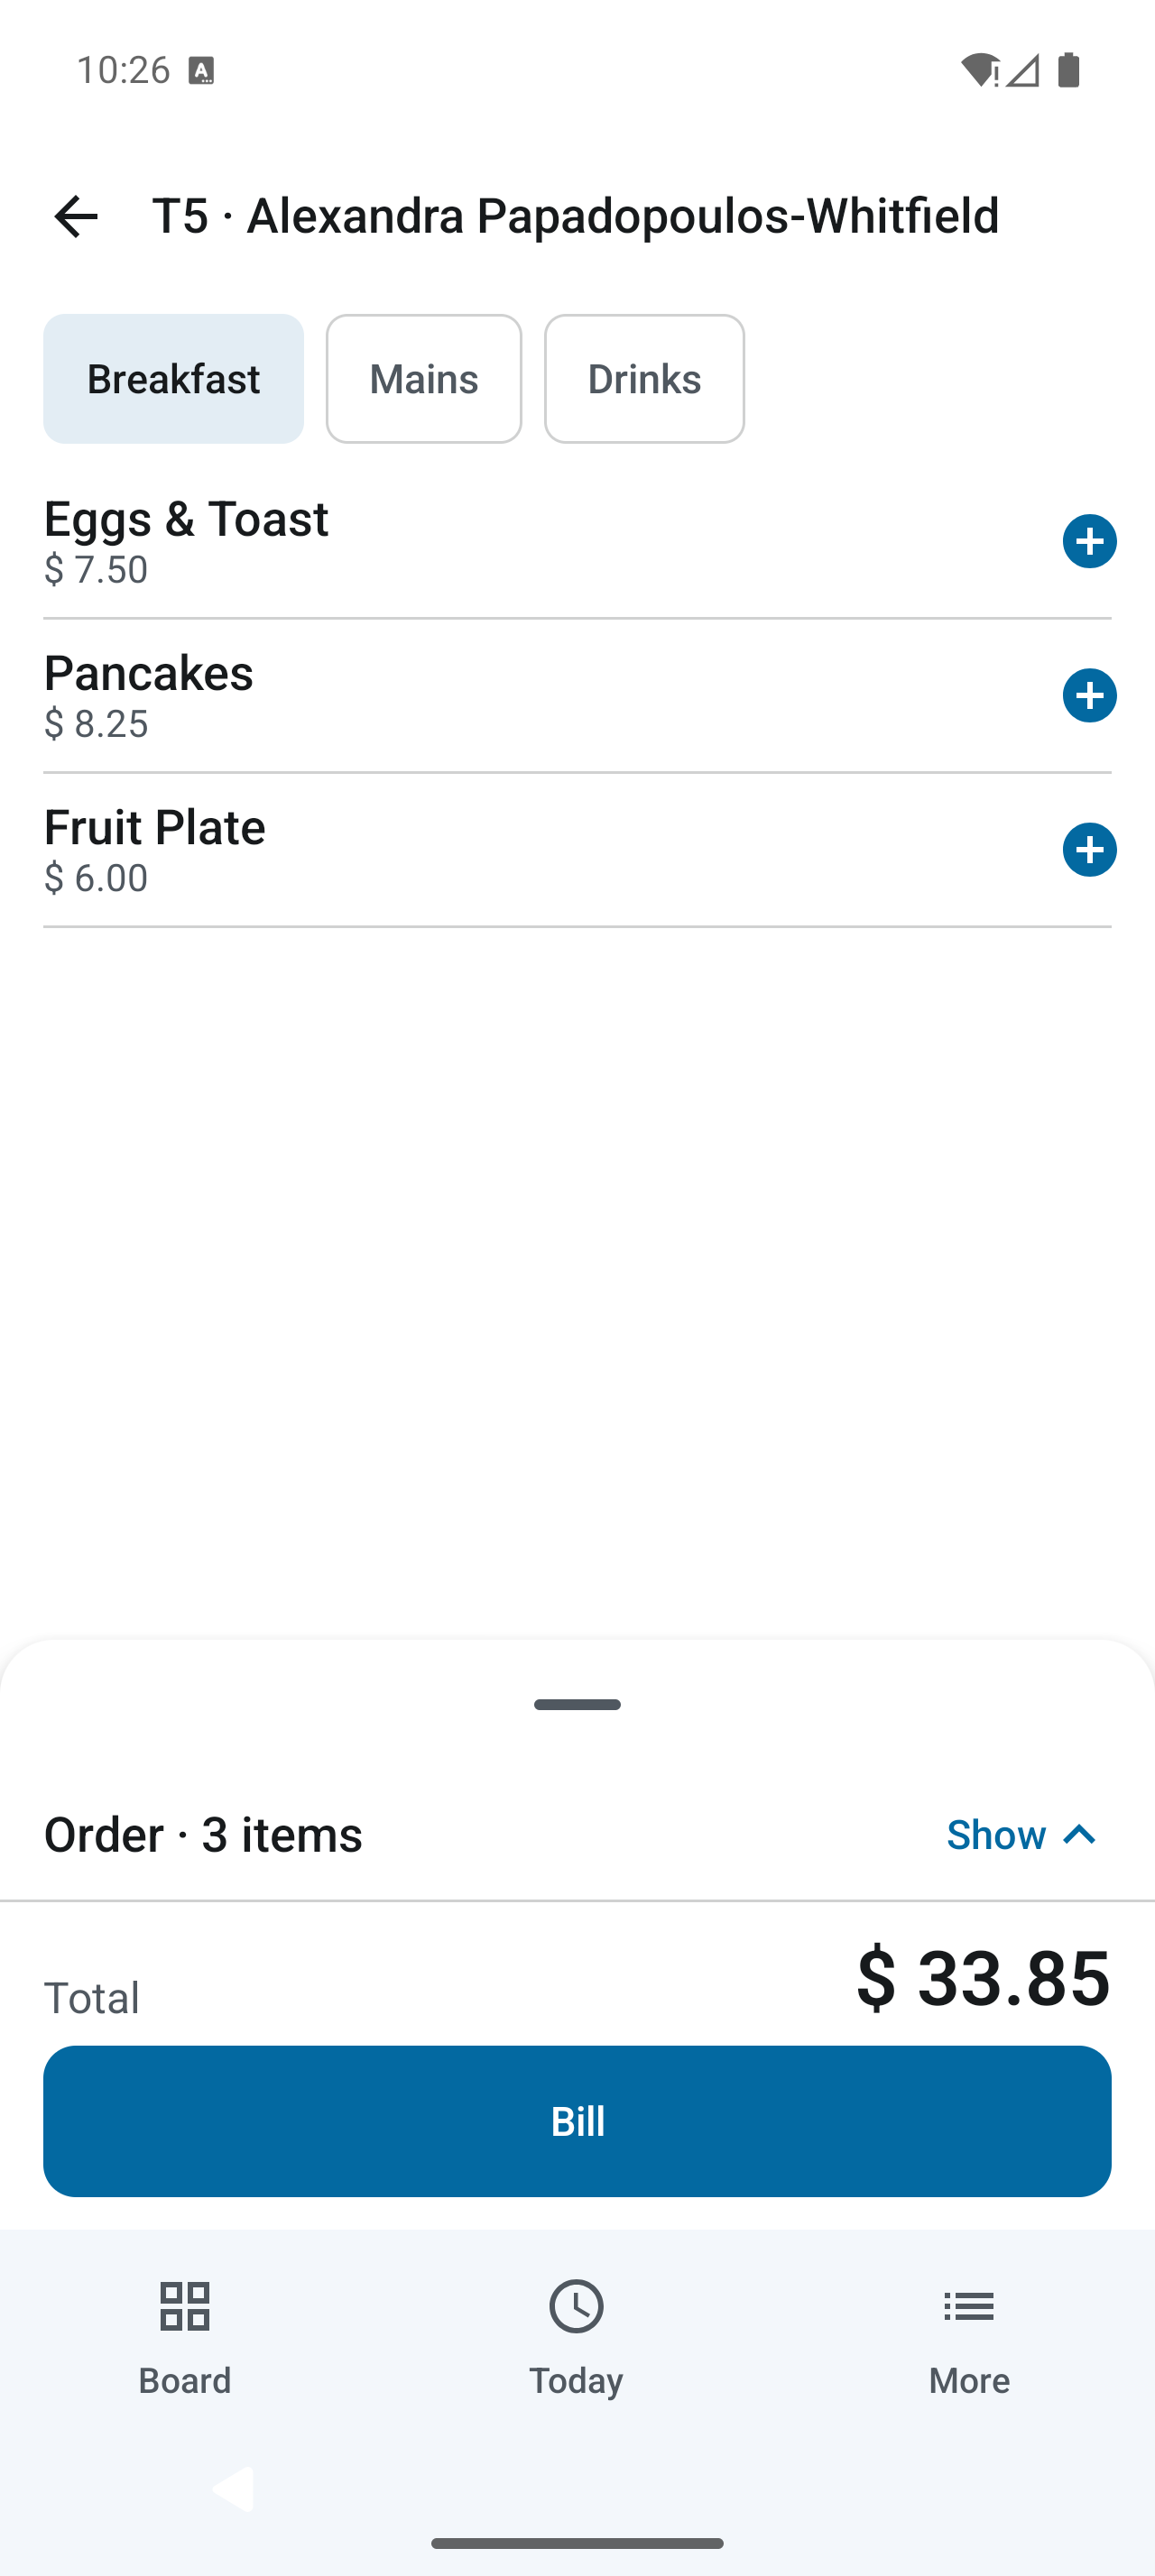
- Open the eligible order and select Charge to room.
- Choose the checked-in guest’s room. Confirm the guest and amount carefully.
- Confirm the transfer. The folio receives a charge and the order closes for settlement at the room.
- Collect the amount through the room folio, together with the rest of the stay.
Room-service orders settle on the room folio. Where Serve to room is offered, review its displayed food serve charge.
For a wrong transfer, use the authorized Reverse the charge action and give a reason. The folio receives a reversal and the order can be billed again. A guest who has already checked out cannot receive a new room charge.
Sell services and extras
Enable the service module for operations such as kayaking, spa treatments or transport. Configure it in More → Setup → Services and prices.
- Create a category, such as Wellness or Water sports, then add each service and its price.
- Use Offered or Not offered today to manage availability.
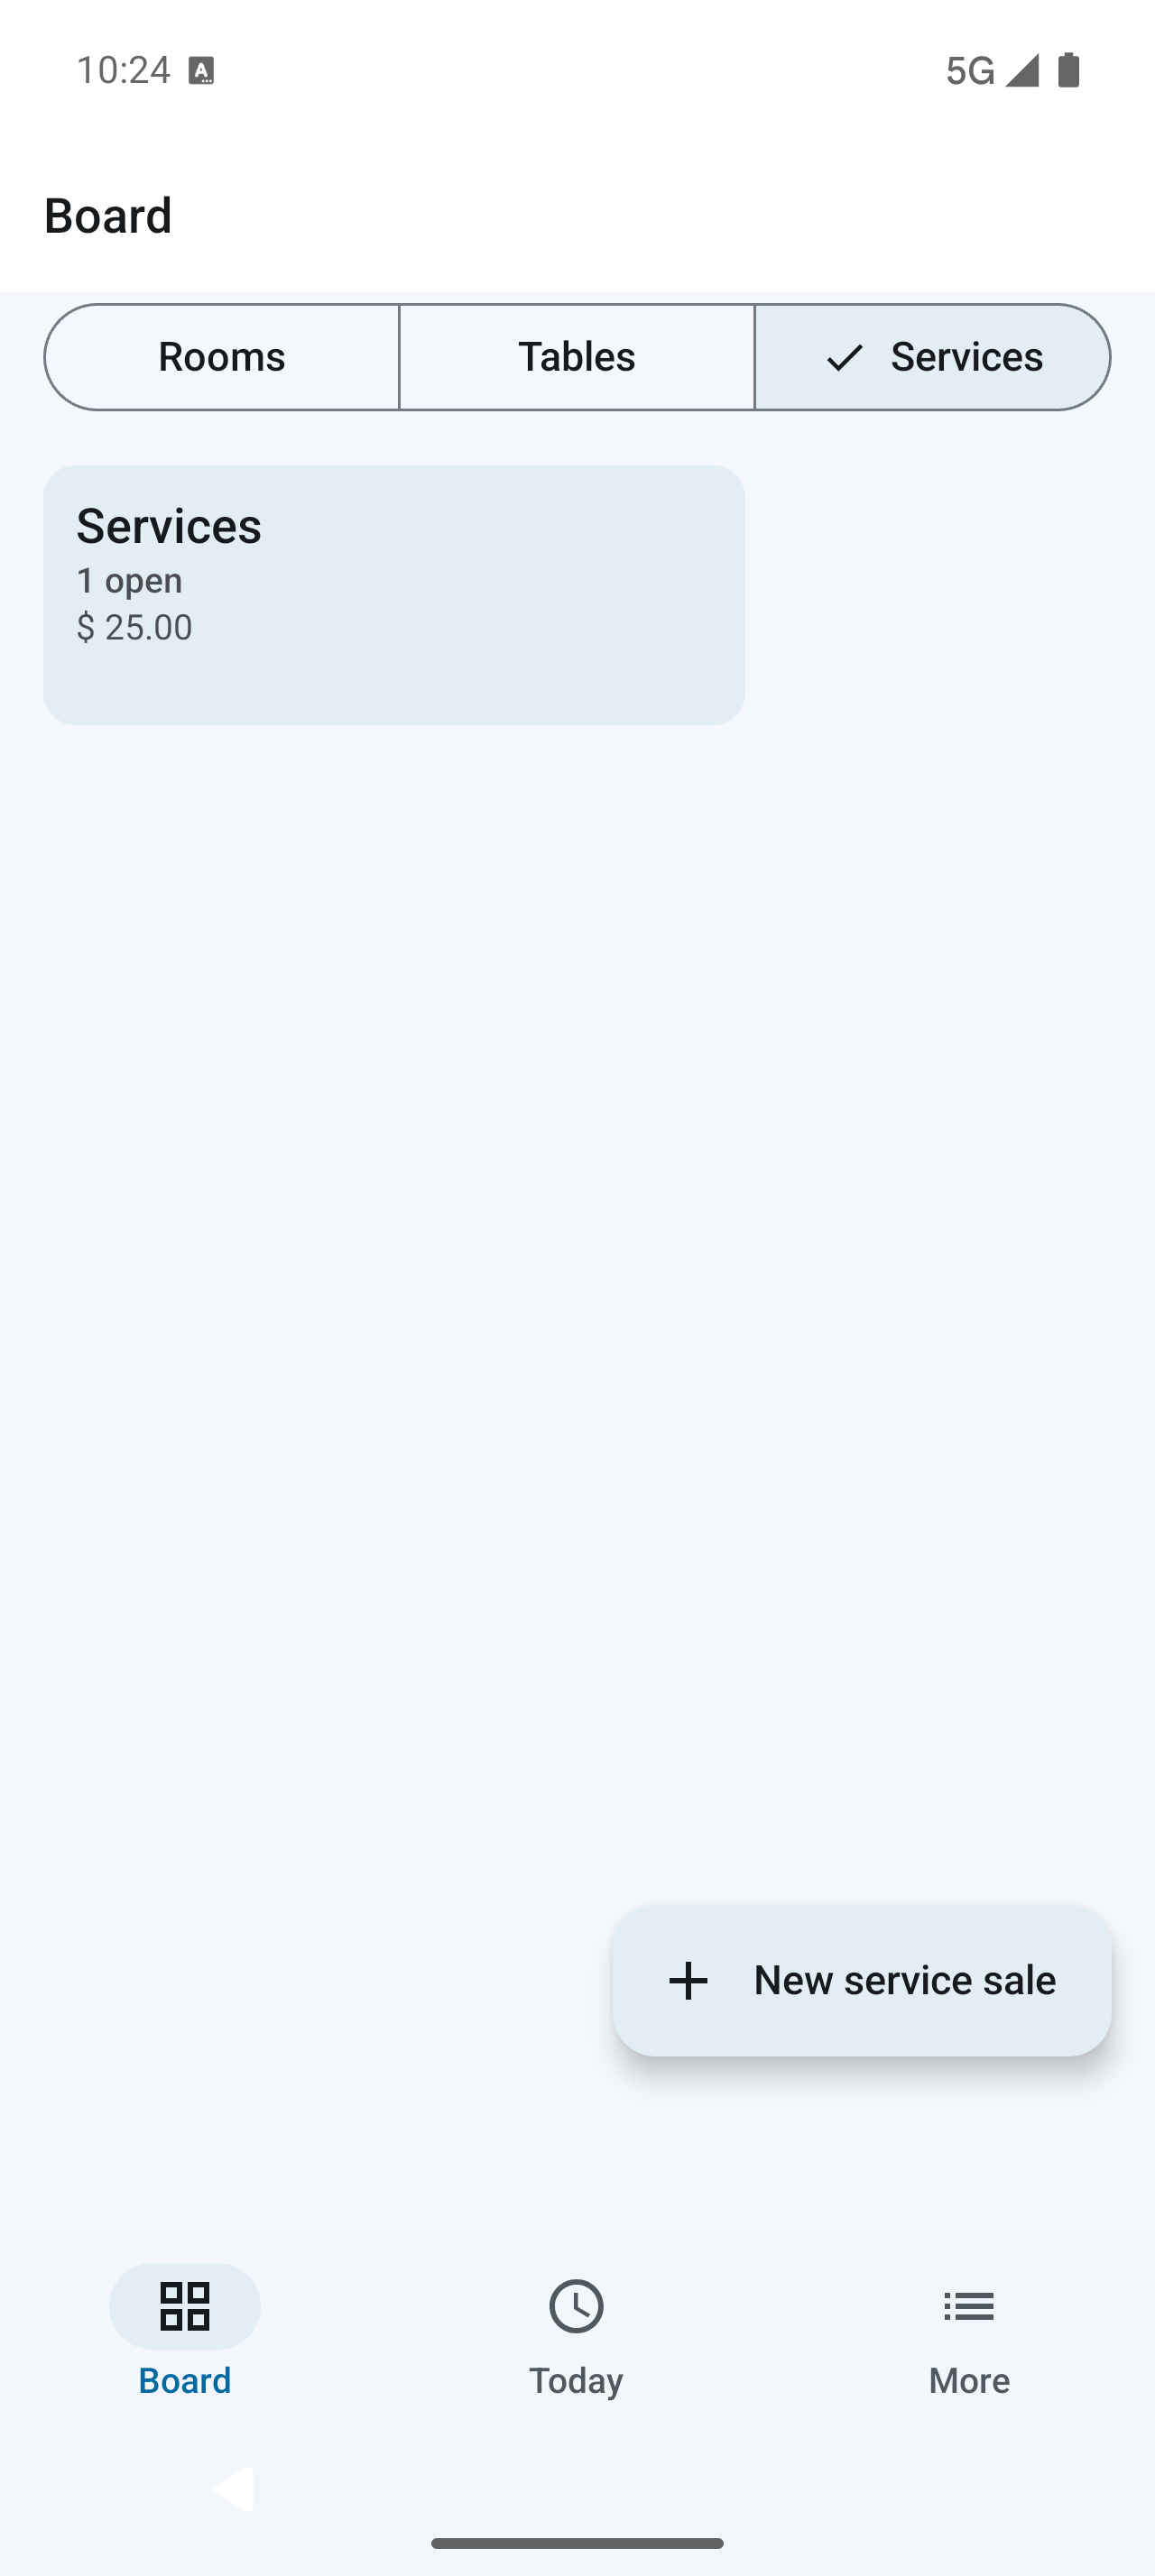
- Open Services on the board and select New service sale.
- Add the services and quantities, review the sale, then follow the billing and payment actions.
- Where room settlement is available, select the correct checked-in guest and review the transfer before confirming.
Use the service reports to review quantities sold and revenue. The service catalogue records what you sell; do not treat it as an appointment calendar or resource scheduler.
Record payments and corrections
Take a payment
- Open the order or folio and select Take payment.
- Select Paid by: cash, card, mobile banking or bank transfer, as offered.
- Enter the amount received. For cash, enter Cash handed over to see change.
- For split payments, select Split with another method and enter the next amount. Add a transaction reference where useful.
- Check the remaining balance and select Record payment. Share the receipt if required.
Correct a mistake
Use the specific correction action and provide a reason. Protected corrections request the config PIN when enabled.
| Action | When to use it |
|---|---|
| Void payment | A payment was recorded incorrectly. Restra adds a reversing entry and retains the history. |
| Refund | Money is actually returned to the customer. |
| Correct this bill | An eligible billed order needs to reopen so its items can be corrected. |
| Discount | A legitimate price reduction, using the available line or bill discount action. |
Respect the on-screen limits. An order with money against it may require a refund or payment void first. For a room transfer, reverse the room charge through its dedicated action.
Track expenses and cash
Record an expense
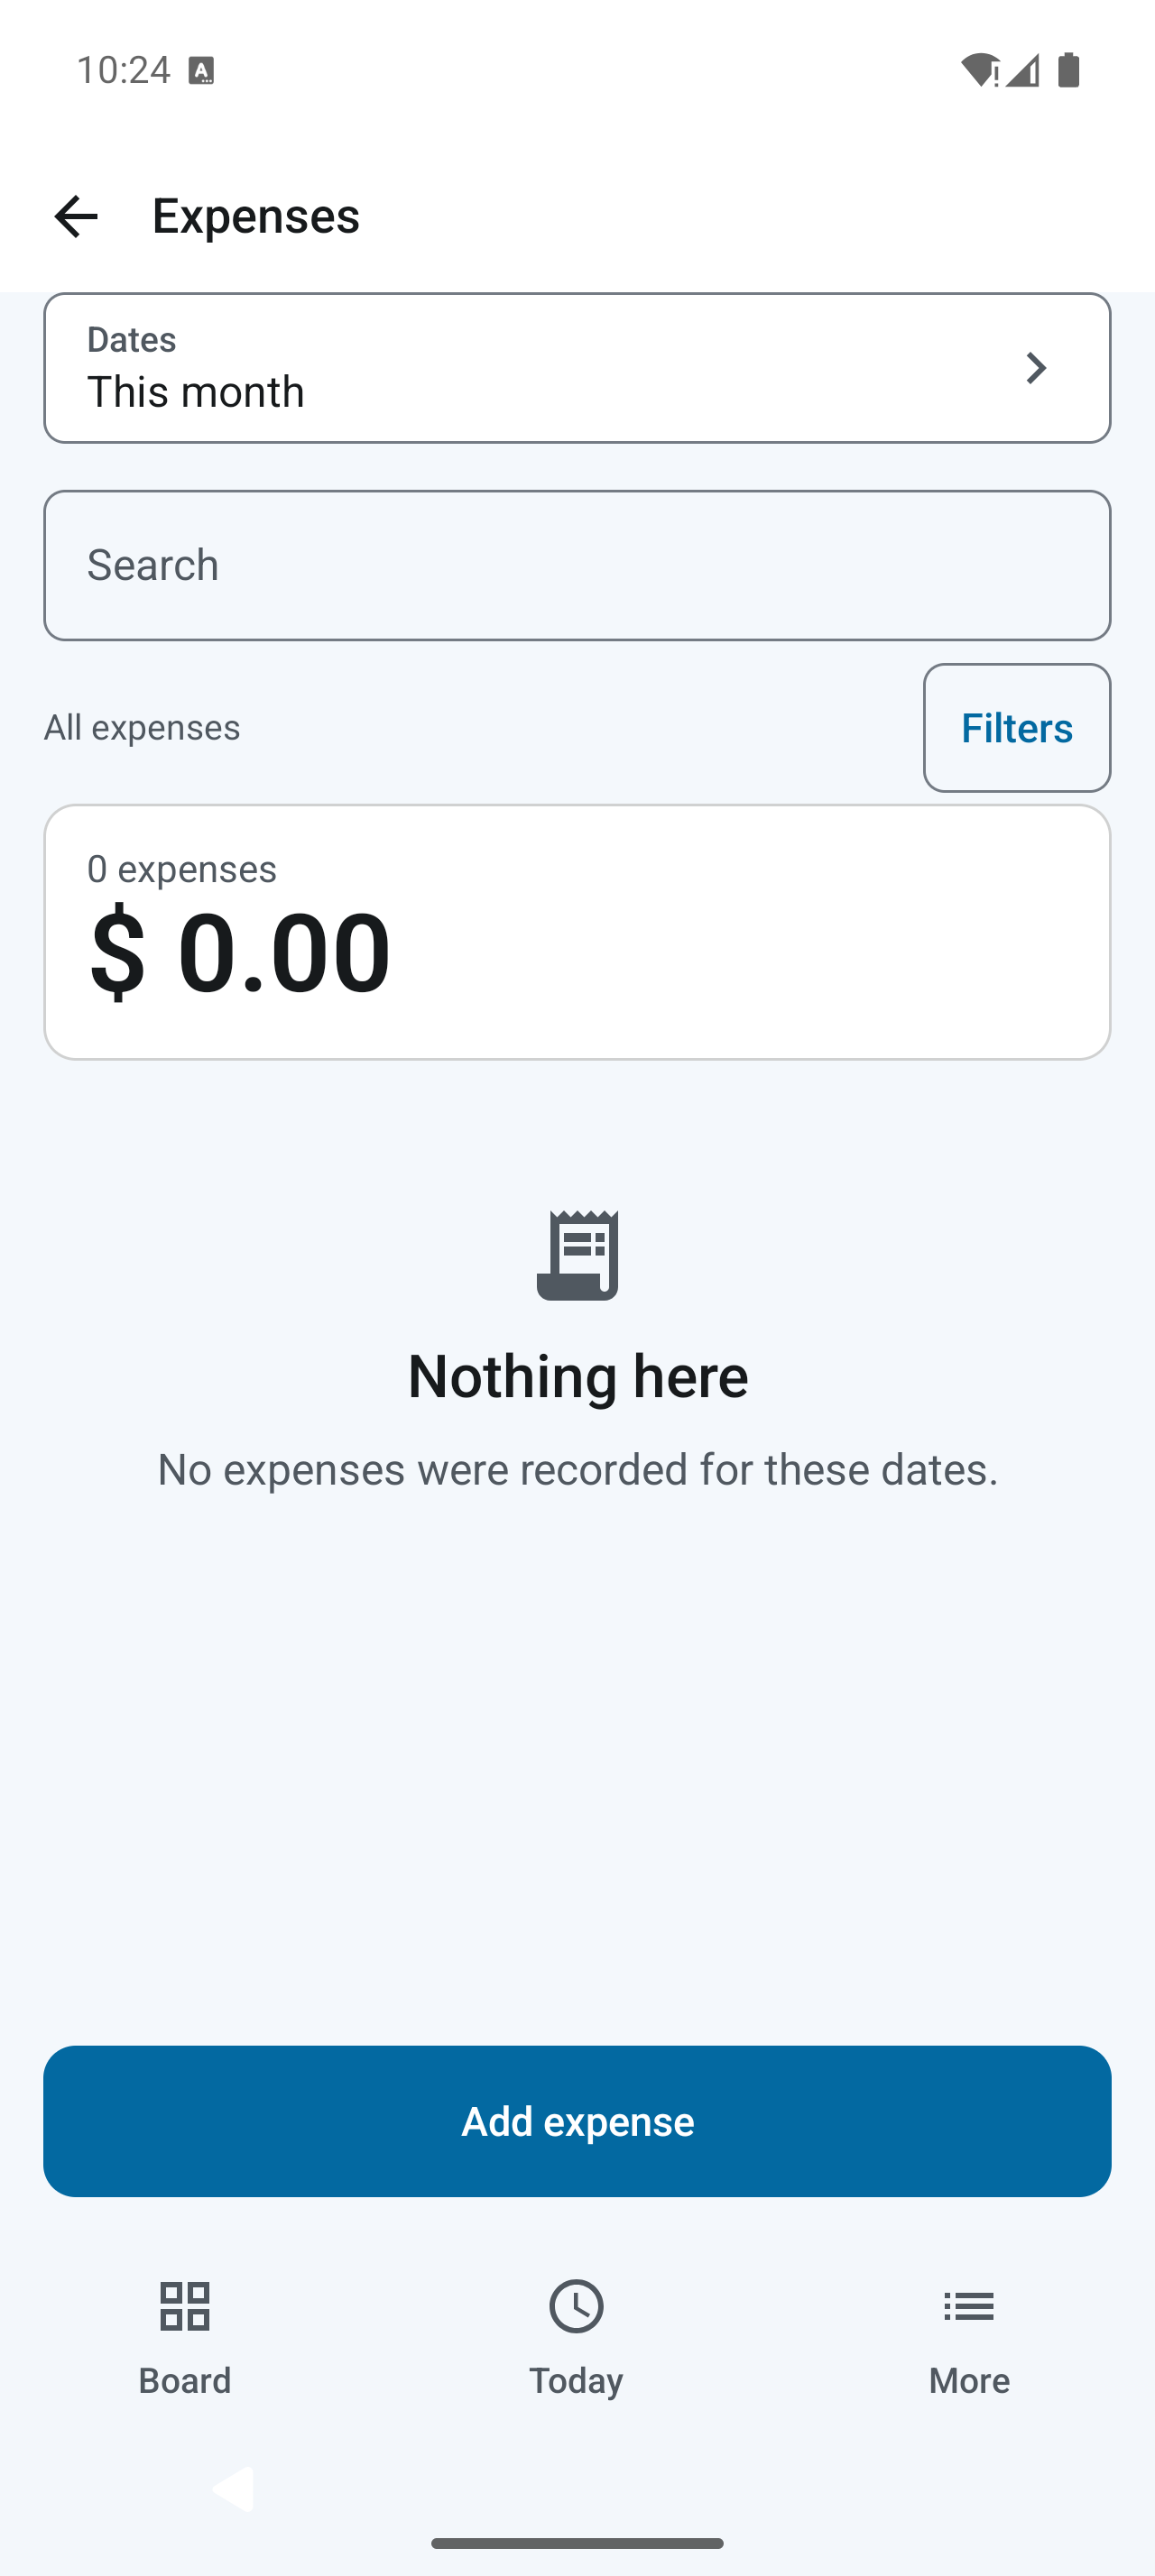
- Open More → Expenses → Add expense.
- Enter the amount and category. Categories are managed in Setup → Expense categories.
- Select Paid from. A cash expense reduces the drawer balance; another method does not.
- Choose the expense date and, under details, enter who was paid and a note. Future expense dates are not allowed.
- Select Save. Use dates, search and filters to find it later.
Keep the cash drawer understandable
Open More → Reports → Business → Cash book to review recorded cash movements for a period. Compare the recorded balance with the cash physically in the drawer. Cash expenses affect the drawer; expenses paid by another method do not.
Count the physical cash and investigate any difference against the entries in the Cash book. Banking cash or adding owner funds is conceptually different from an operating expense or a customer sale.
Review reports and history
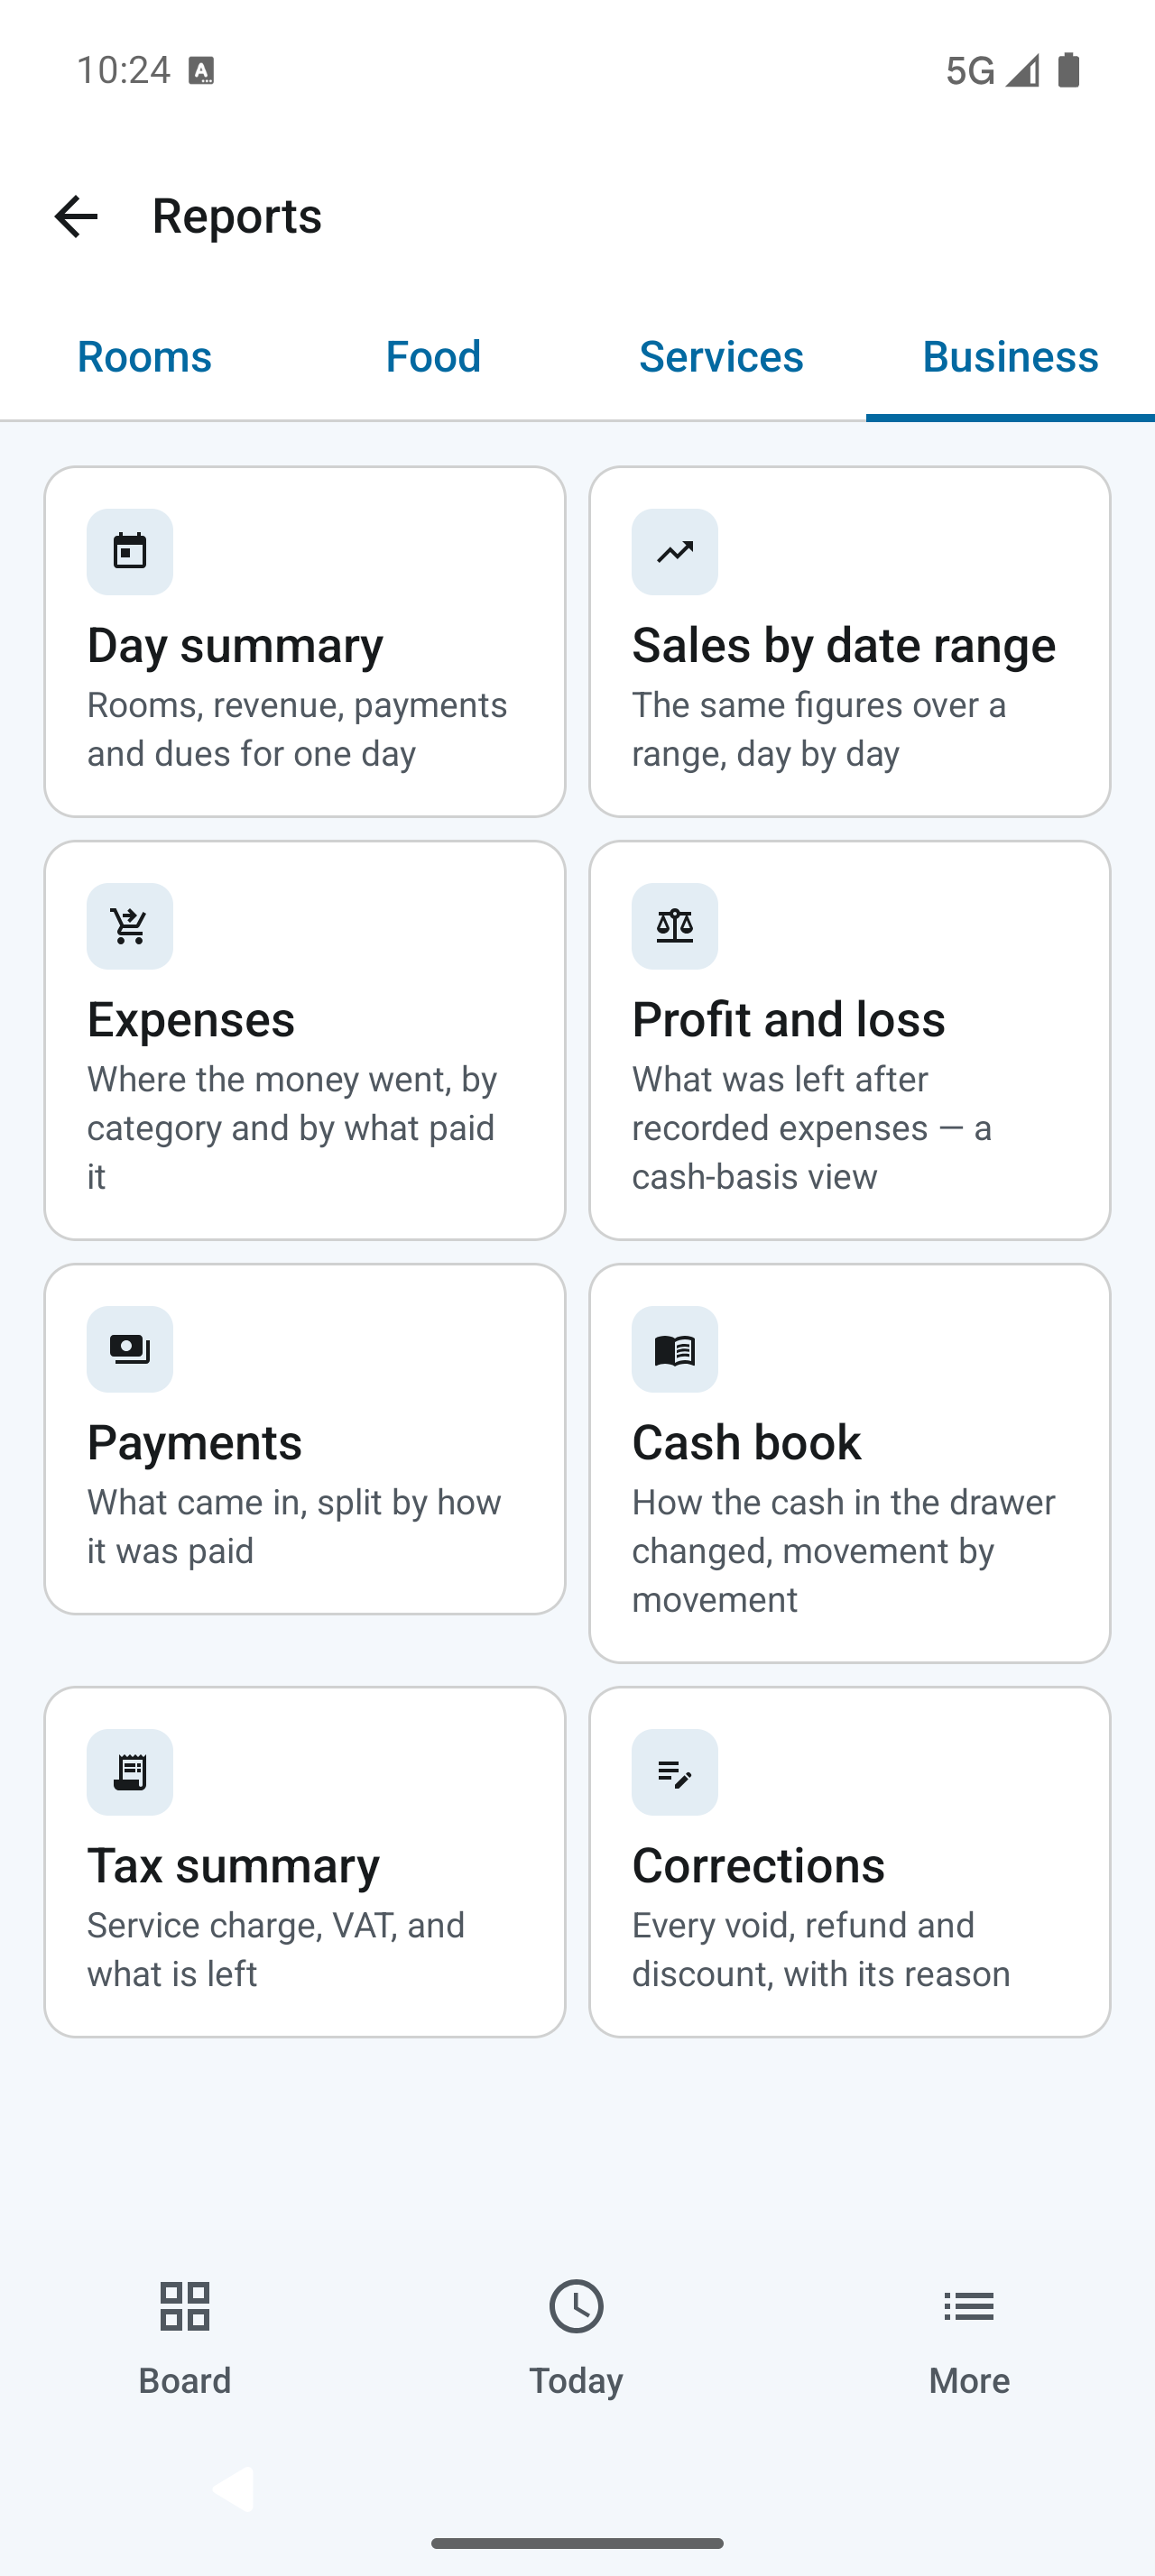
- Open More → Reports.
- Choose the relevant area: Rooms, Food, Services or Business, depending on enabled modules.
- Select the report and its day or date range.
- Review the figures and use a sharing or export action where offered.
Available reports include day summary, sales by date range, outstanding dues, top items and service sales. Business reporting includes expenses, profit and loss, payments, cash book, tax summary and corrections.
More → History provides a calendar of recorded bookings, check-ins, orders, expenses and payments. Use Bookings, Guests and Orders for their individual records.
Share PDFs and print
Booking confirmations, guest invoices, restaurant bills, payment receipts and kitchen tickets are generated from their records.
- Find a stay in More → Bookings, or a restaurant sale in More → Orders.
- Open the relevant record and select the available document or share action.
- Choose an app from Android’s share sheet. Save or send the PDF using that app.
Restra regenerates documents when needed; there is no separate permanent PDF library in More. Creating a PDF works offline, but sending it through an online messaging or email app needs that app’s connectivity.
Optional thermal printing
Open More → Setup → Thermal printer and enable printing if available. Configure the supported printer connection and paper width, then print a test slip. Grant the requested device permissions. Use print actions on eligible bills, receipts and kitchen tickets.
If printing fails, check the configured printer, its connection and permissions. Use Share PDF as the fallback.
Back up and restore safely
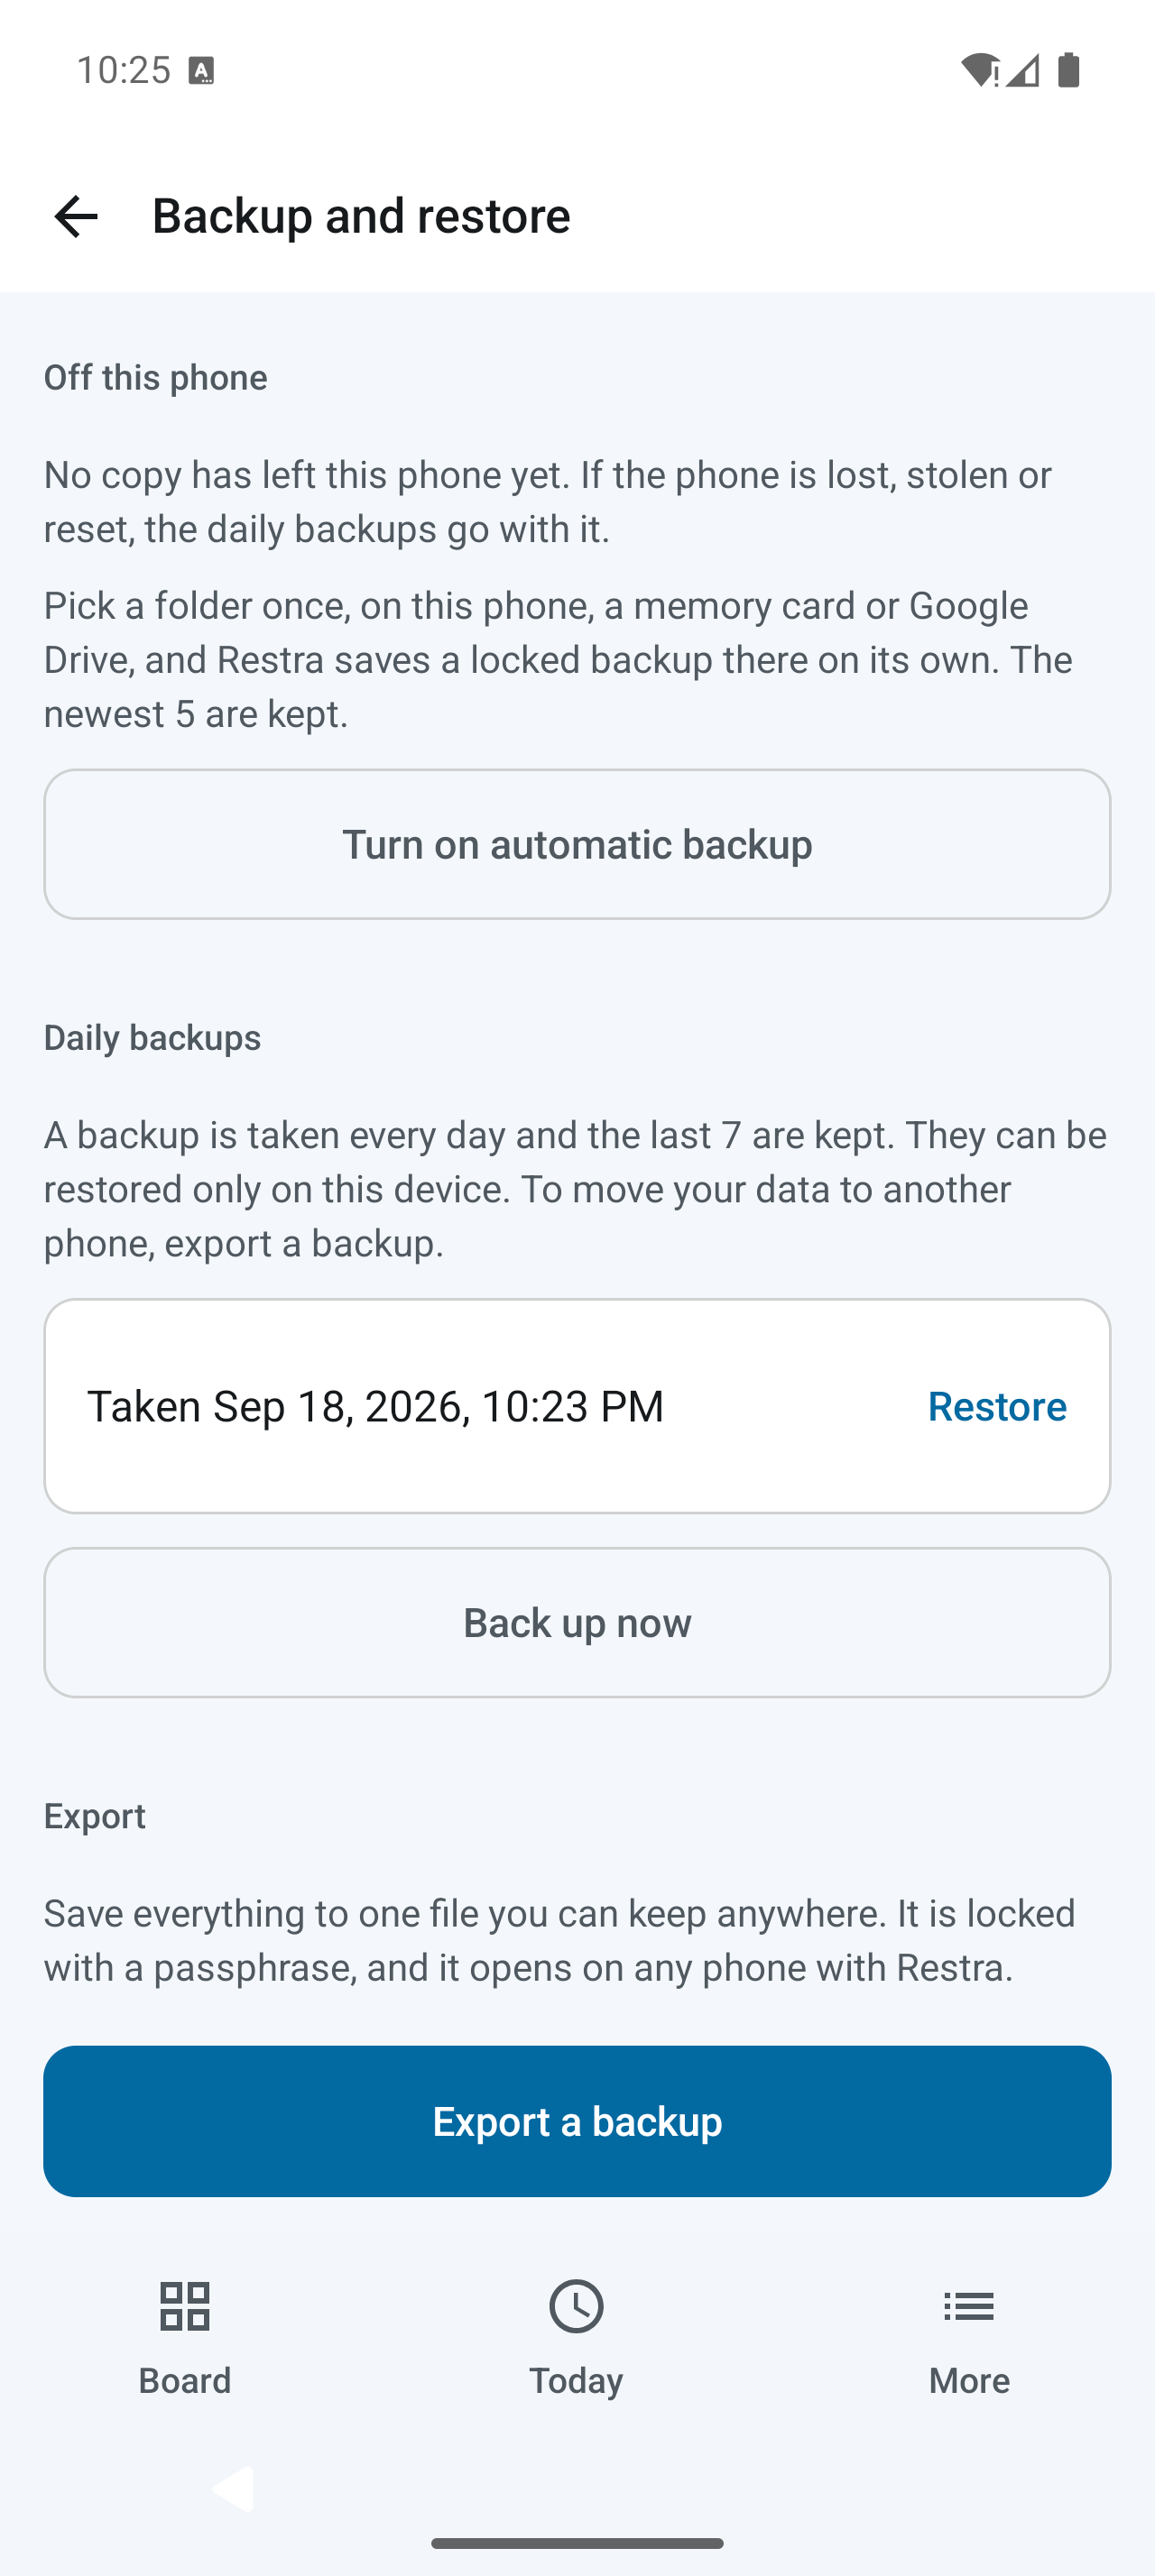
Open More → Setup → Backup and restore. Enter the config PIN if enabled.
Daily local backups
Restra schedules daily backups and keeps the latest seven. Use Back up now for an immediate copy. These backups are tied to this installation’s device key; they are not a way to move to a new phone.
Export a portable backup
- Select Export a backup.
- Choose and confirm a passphrase of at least eight characters.
- Select Export and share, then keep the .restra file somewhere you can access if the phone is lost.
- Store the passphrase separately. It is needed to open the exported file.
Automatic folder backups
Under Off this phone, select a reachable folder and configure the passphrase and schedule. The newest five copies are kept. A folder on this phone still lives on this phone; choose an external destination for protection against device loss. Cloud folders need an available provider and connectivity.
Restore a backup
Select Restore from a file, choose the backup and enter its passphrase. Review the business and backup date. Follow the typed confirmation and PIN prompts before replacing the data.
Personalize and protect Restra
Appearance, text and language
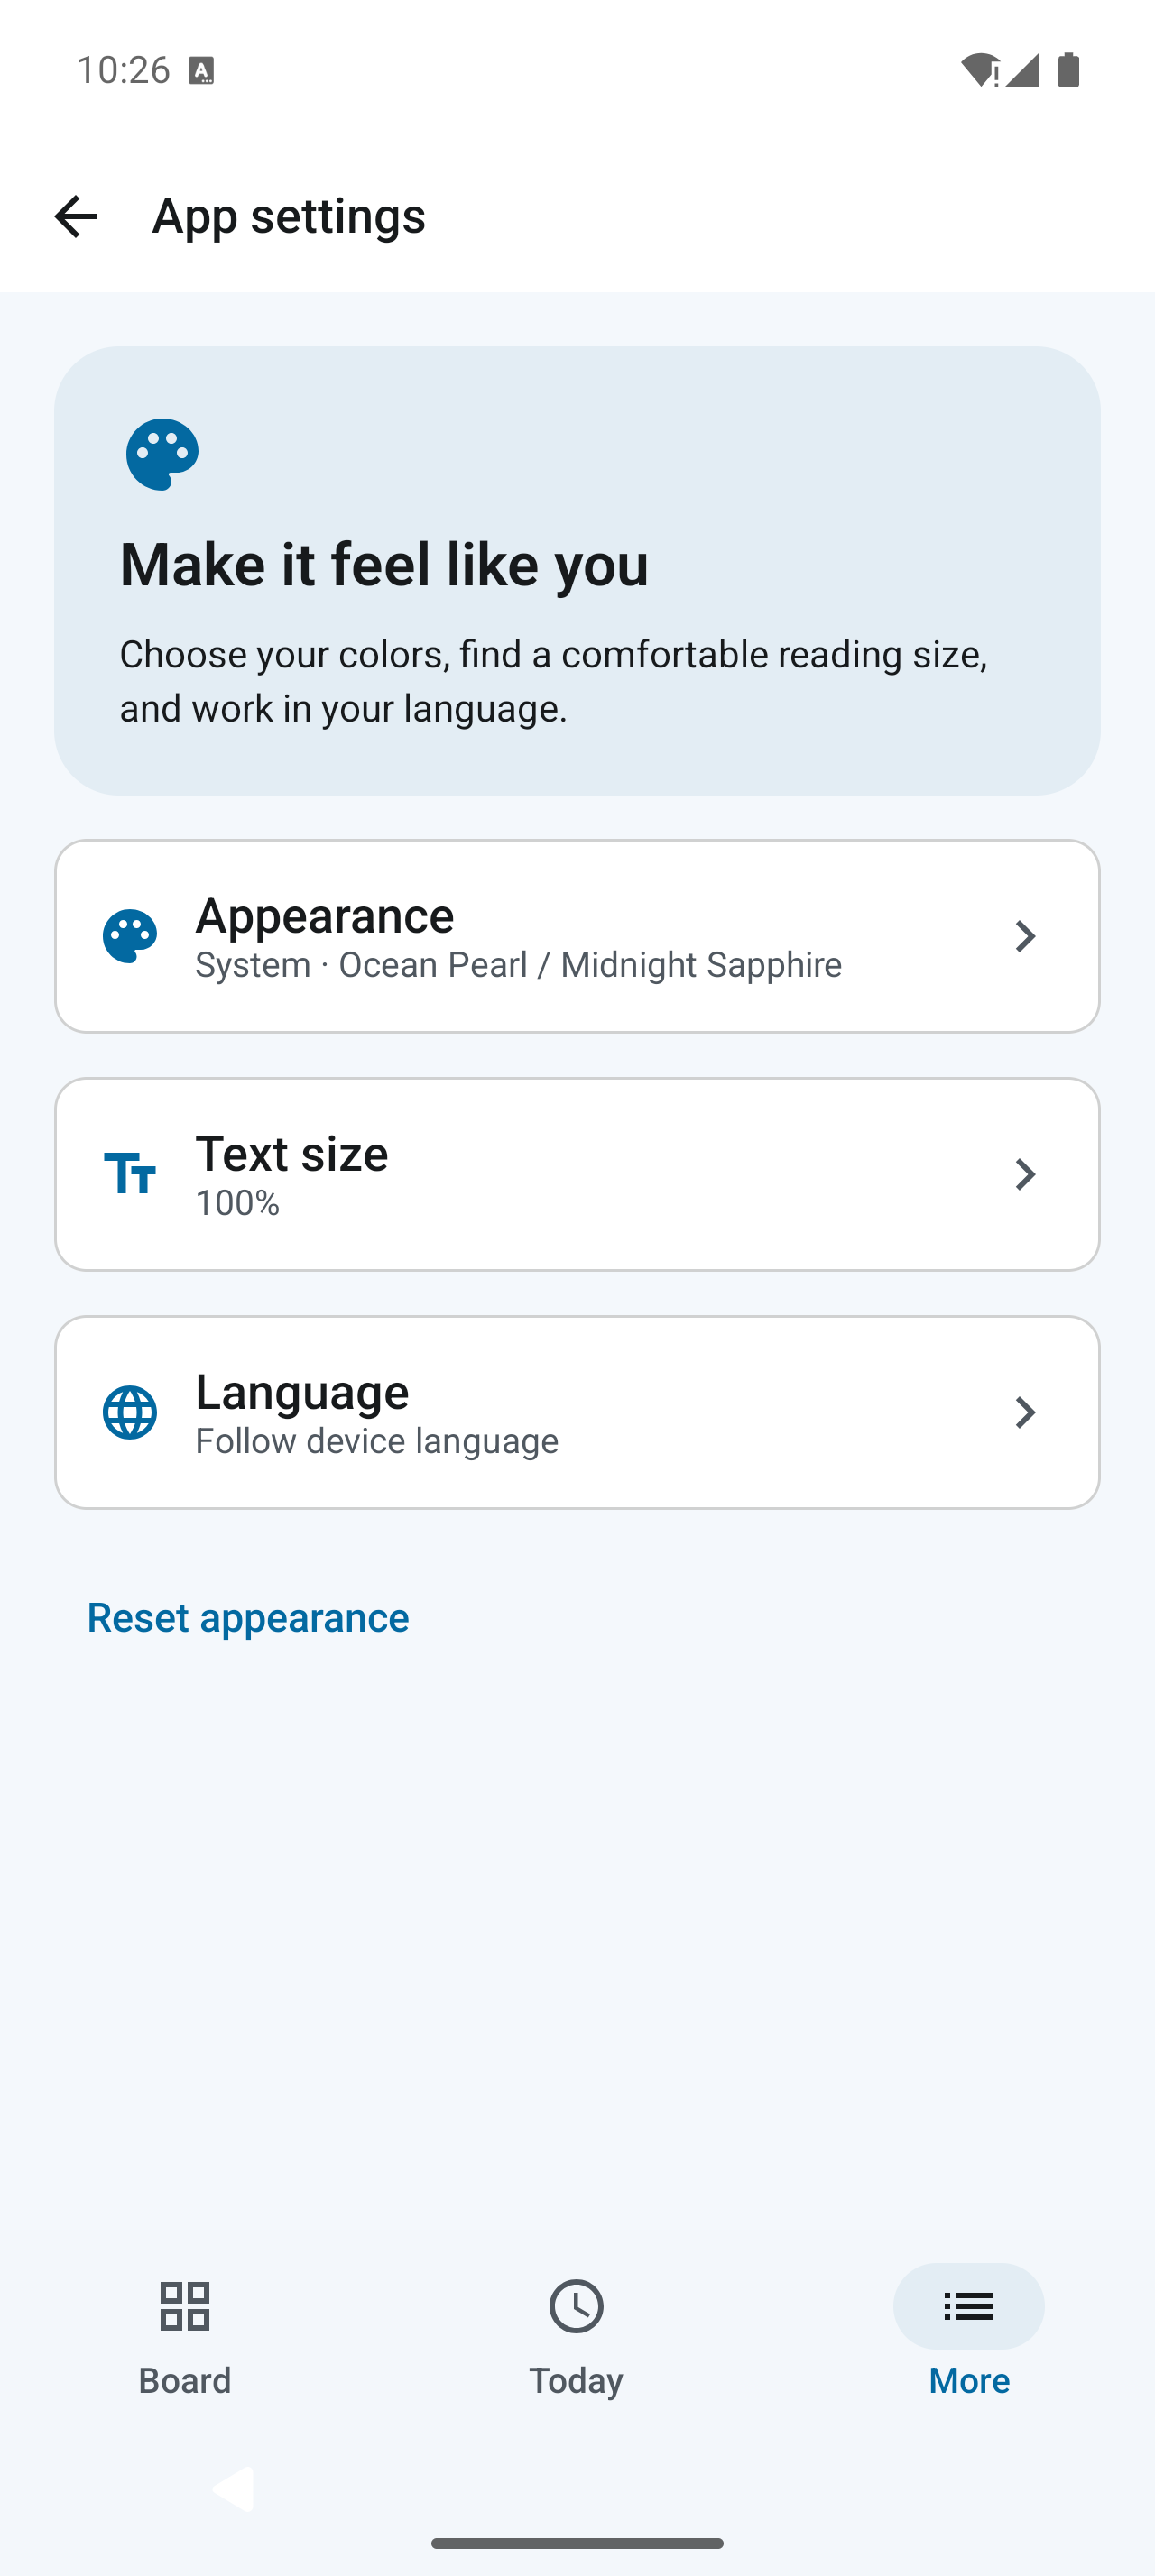
Open More → App settings. Choose Light, Dark or System appearance, select a palette, adjust text size, or search for your language. The app’s language choices are bundled for offline use. User-entered business names, menu items and records stay in their original language.
These preferences belong to the device. Resetting appearance restores its defaults without changing your language. Your app text size is separate from document typography.
Config PIN
In More → Setup → Config PIN, enable or change the PIN. Keep the recovery code secure. Use Forgot PIN? and the recovery code if needed. Repeated wrong attempts temporarily lock configuration; routine bookings and orders remain available.
Account and optional sync
The counter works without an online account. If you choose to use account and sync features, sign in through More → Account and review Setup → Sync. Online features require connectivity and a configured service. Check their displayed status; offline operation does not imply that a remote copy is current.
A simple daily routine
| When | What to check |
|---|---|
| Start of day | Review Today, arrivals and departures. Check room cleanliness and unavailable dishes or services. Verify the cash position. |
| During service | Save bookings and orders promptly. Record payments when received. Add expenses with the correct payment method. |
| Guest departure | Review the folio, settle or explicitly leave a due, complete checkout and update housekeeping. |
| End of day | Review day summary, dues and corrections. Count the drawer, investigate differences and verify a recent backup. |
Quick troubleshooting
- A screen is missing: check the business modules in Setup. Some settings also depend on rooms, menu data or enabled optional features.
- No room is available: review the dates, occupancy, existing bookings, out-of-service state and cleanliness.
- A bill cannot be shared: the business action may already be saved. Reopen the record and retry sharing before repeating a payment.
- A report looks wrong: check its area, period, day-close settings and recorded payments, refunds and expenses.
- A backup will not open: verify the passphrase and compatible app version. A daily local backup from another installation cannot be used like an exported backup.
Start again with the setup guide or return to the Restra home page.
No chapters match. Try “payment”, “room” or “backup”, or clear the search.